AppsFlyer - AiBid/New User Acquisition Campaign (For Advertisers)
Screenshots
In the following guide, there are 4 dashboard screens that require screenshots.
Please make these screenshots and provide them to Appier.
Providing accurate screenshots helps speed up and ensure the quality of your campaign onboarding process.
Check App Settings
Check that each setting under App Settings is correct
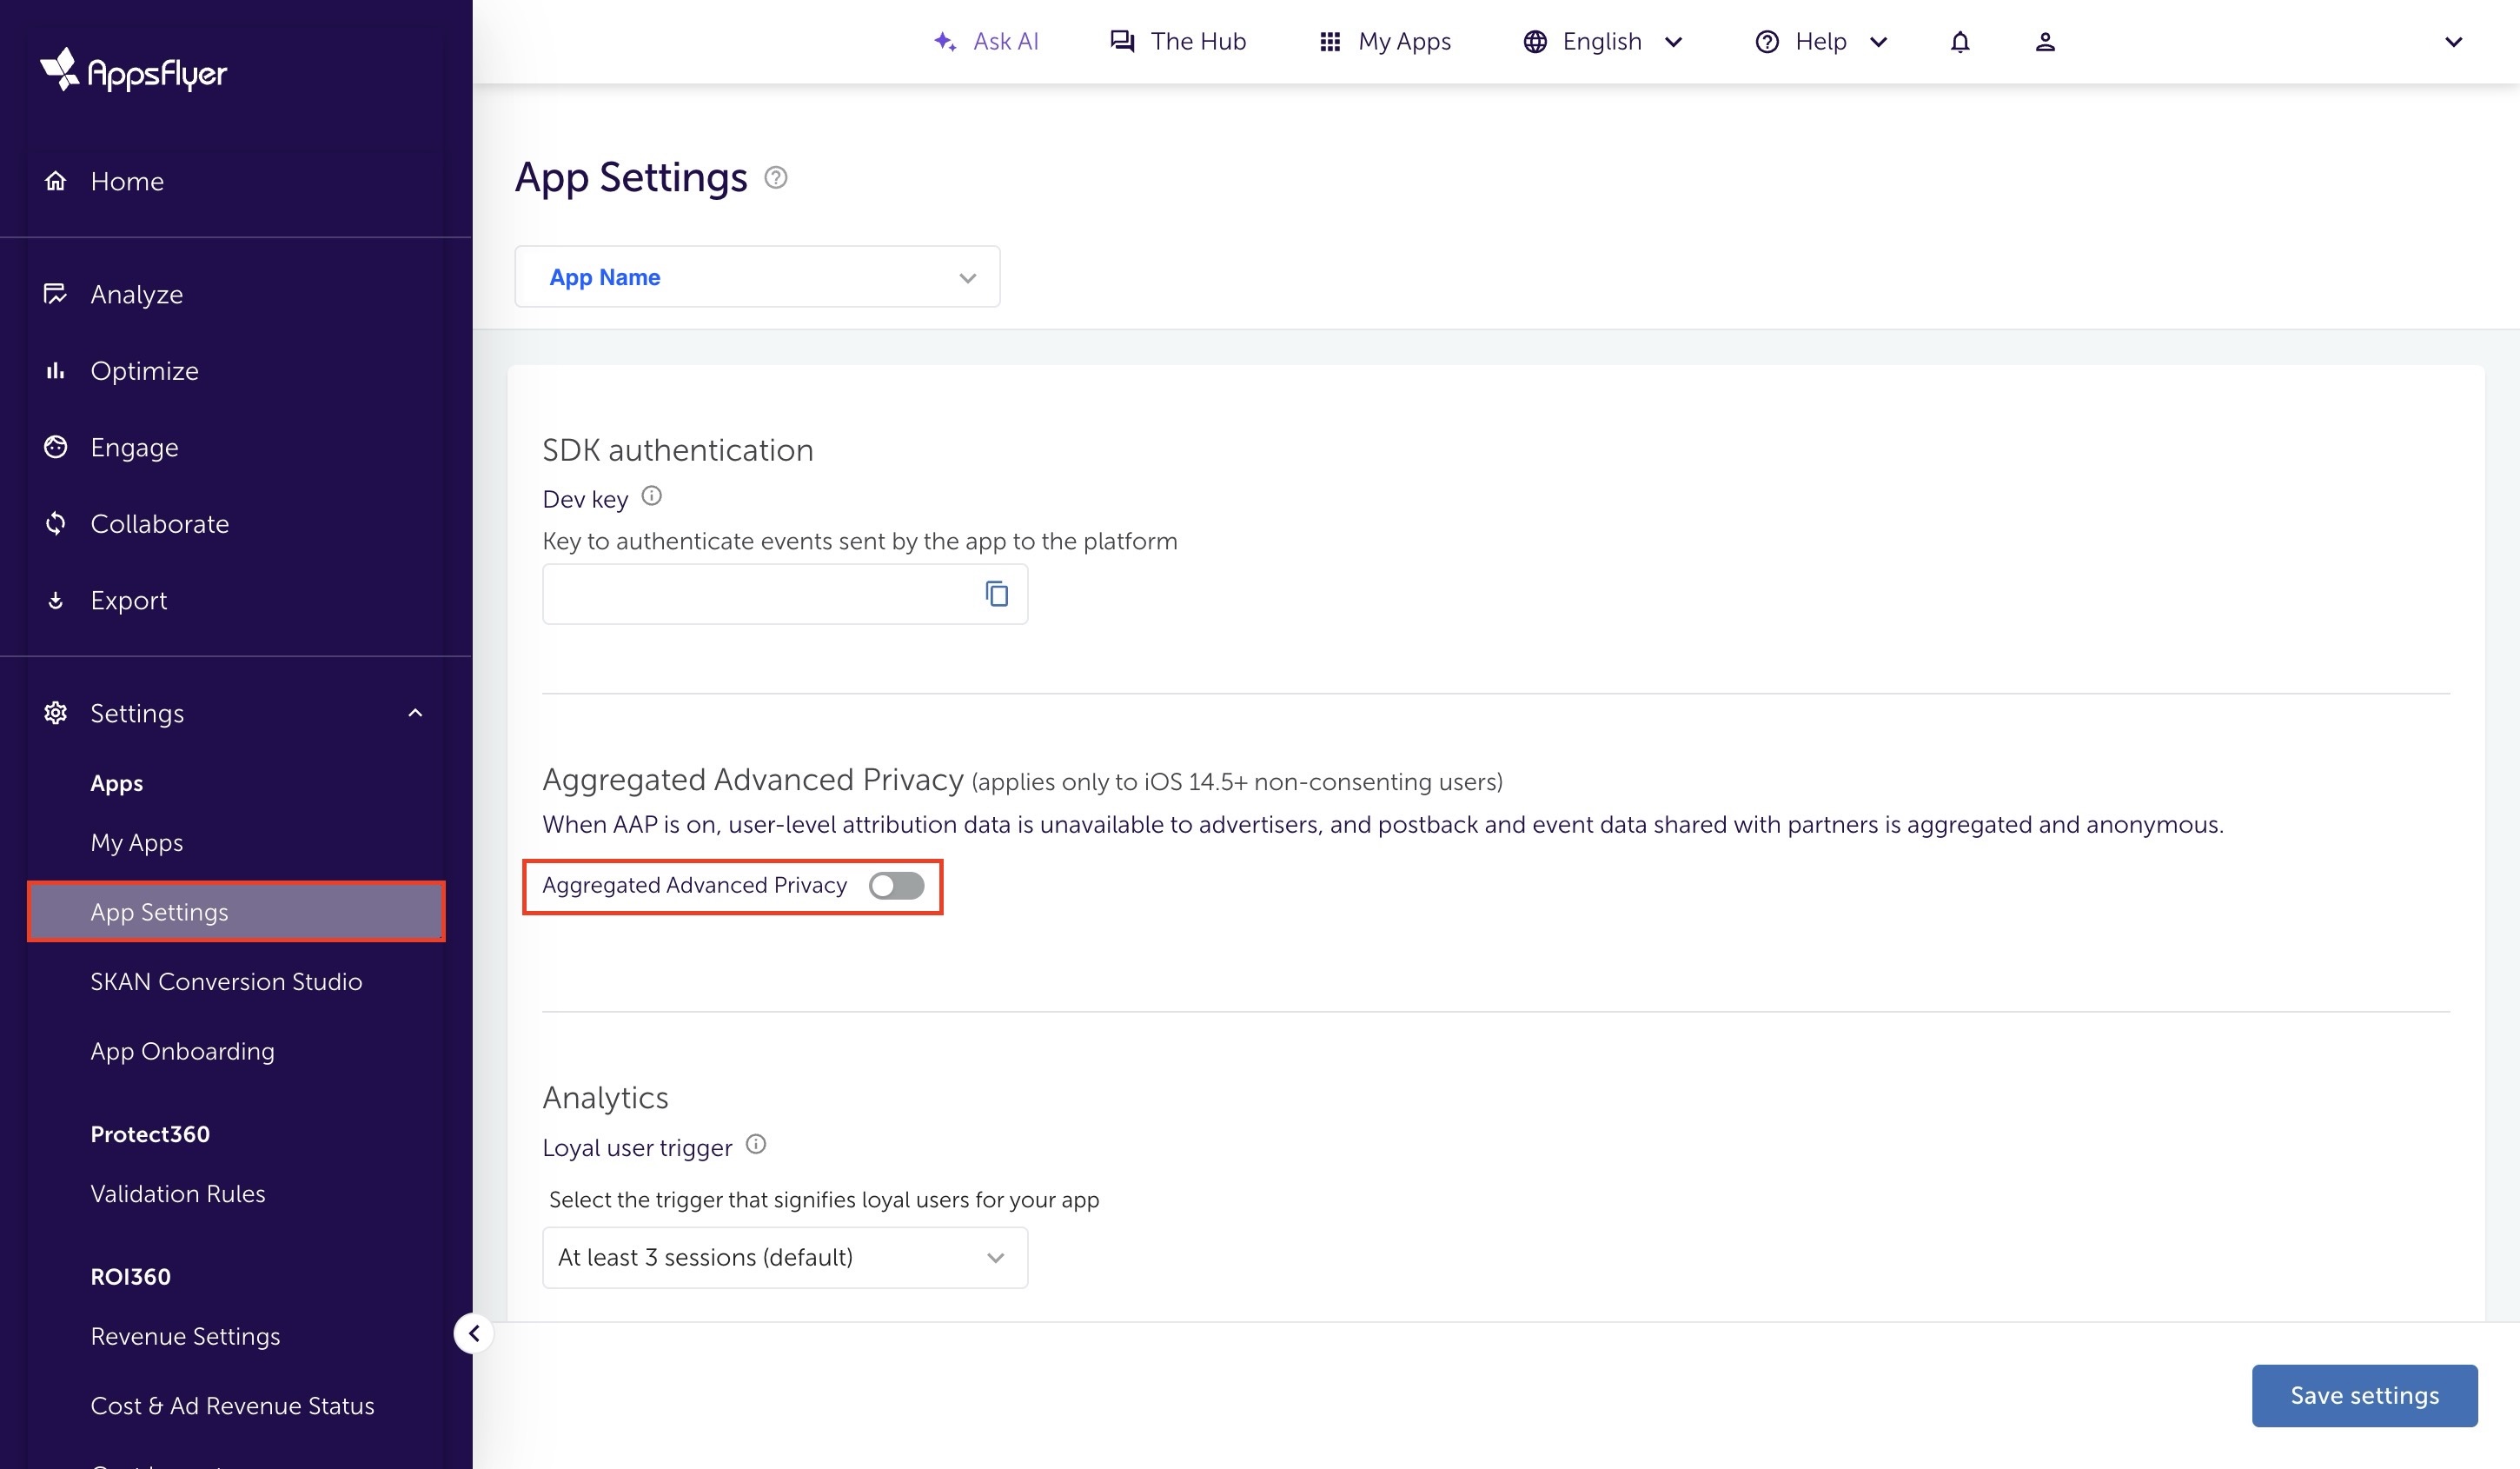
- Click "App Settings" in the navigation sidebar of your app's dashboard.
- Turn OFF "Aggregated Advanced Privacy" (iOS Only).
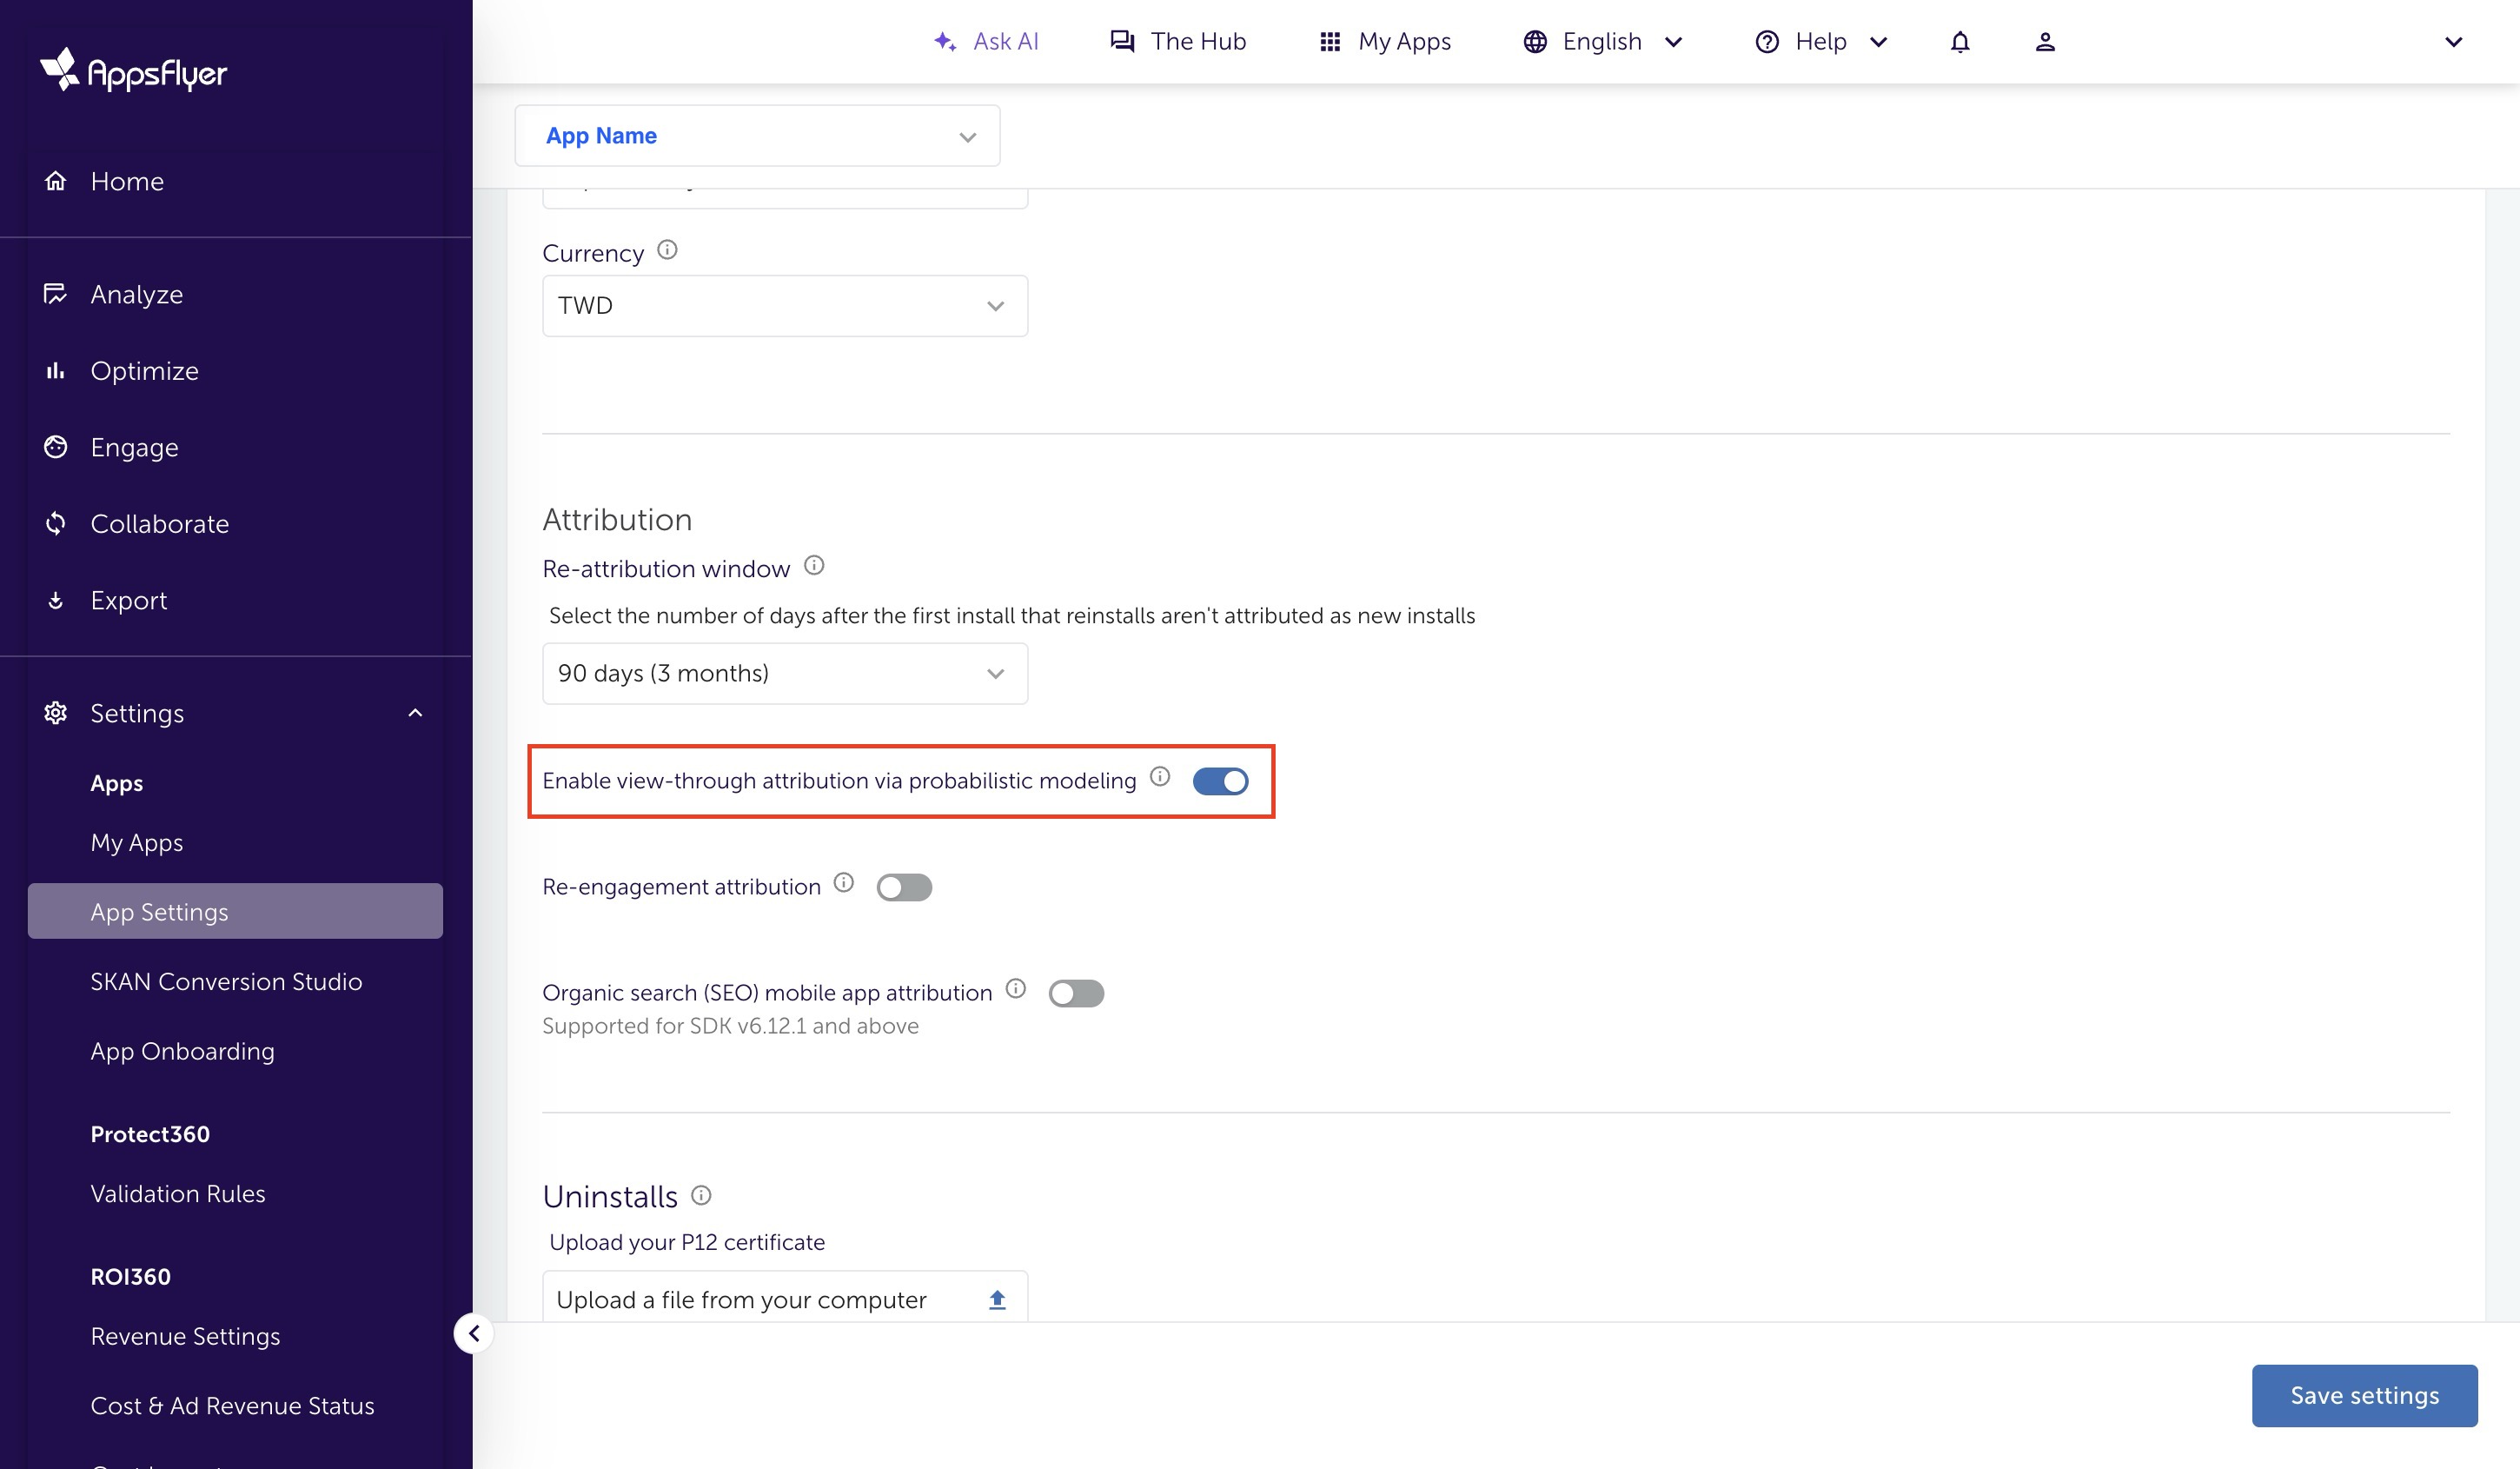
- Enable "View-through attribution via probabilistic modeling" if the campaign will run view-through attribution.
Note
- Note that if running on both iOS and Android, each app has its own App Settings page that will need to be set.
- Appsflyer Guideline also recommends advertiser to enable View-through attribution via probabilistic modeling.

Screenshot 1 of 4
Please make a screenshot of the View-through attribution via probabilistic modeling setting, as shown above.
Navigate to the Appier partner integration module
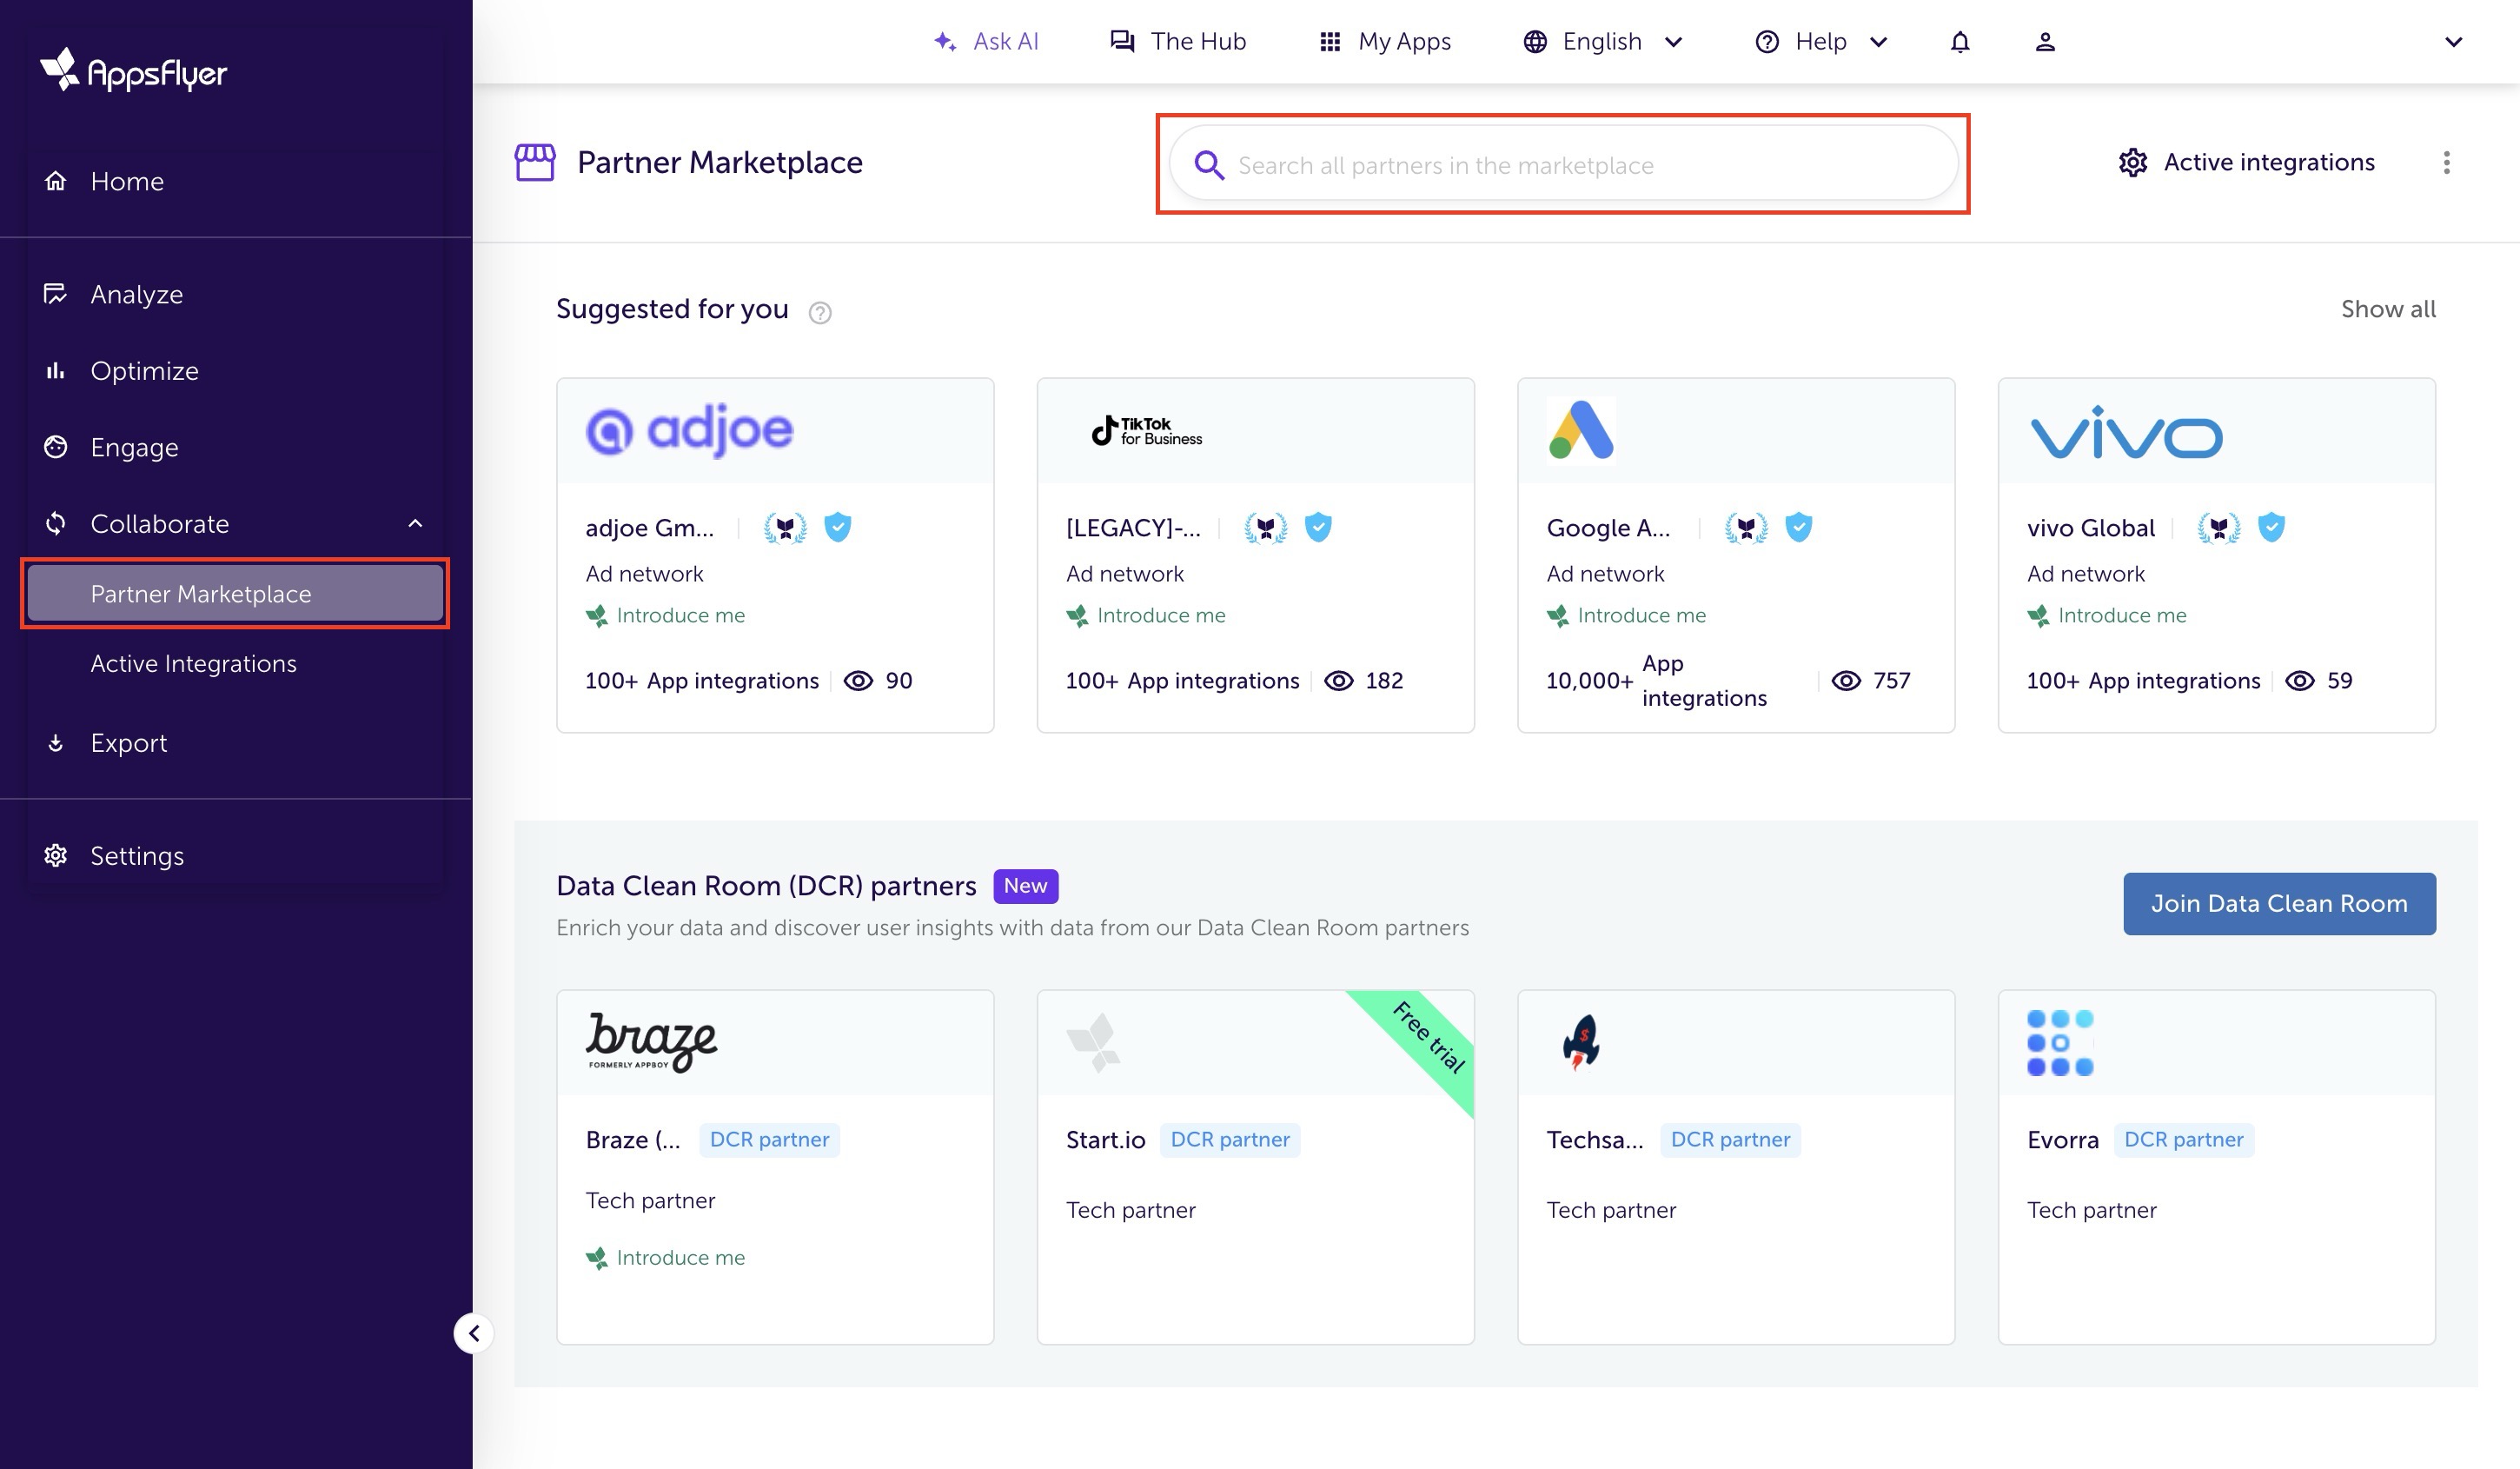
- Click "Collaborate" on the navigation sidebar.
- Click "Partner Marketplace" on the navigation sidebar.
- Type "Appier" in the search bar.
- Choose the partner integration module based on what kind of campaign will be run:
- For programmatic DSP (AiBid) campaigns, choose "Appier"
- For non-programmatic CPI campaigns, choose "Appier (ADNW)"
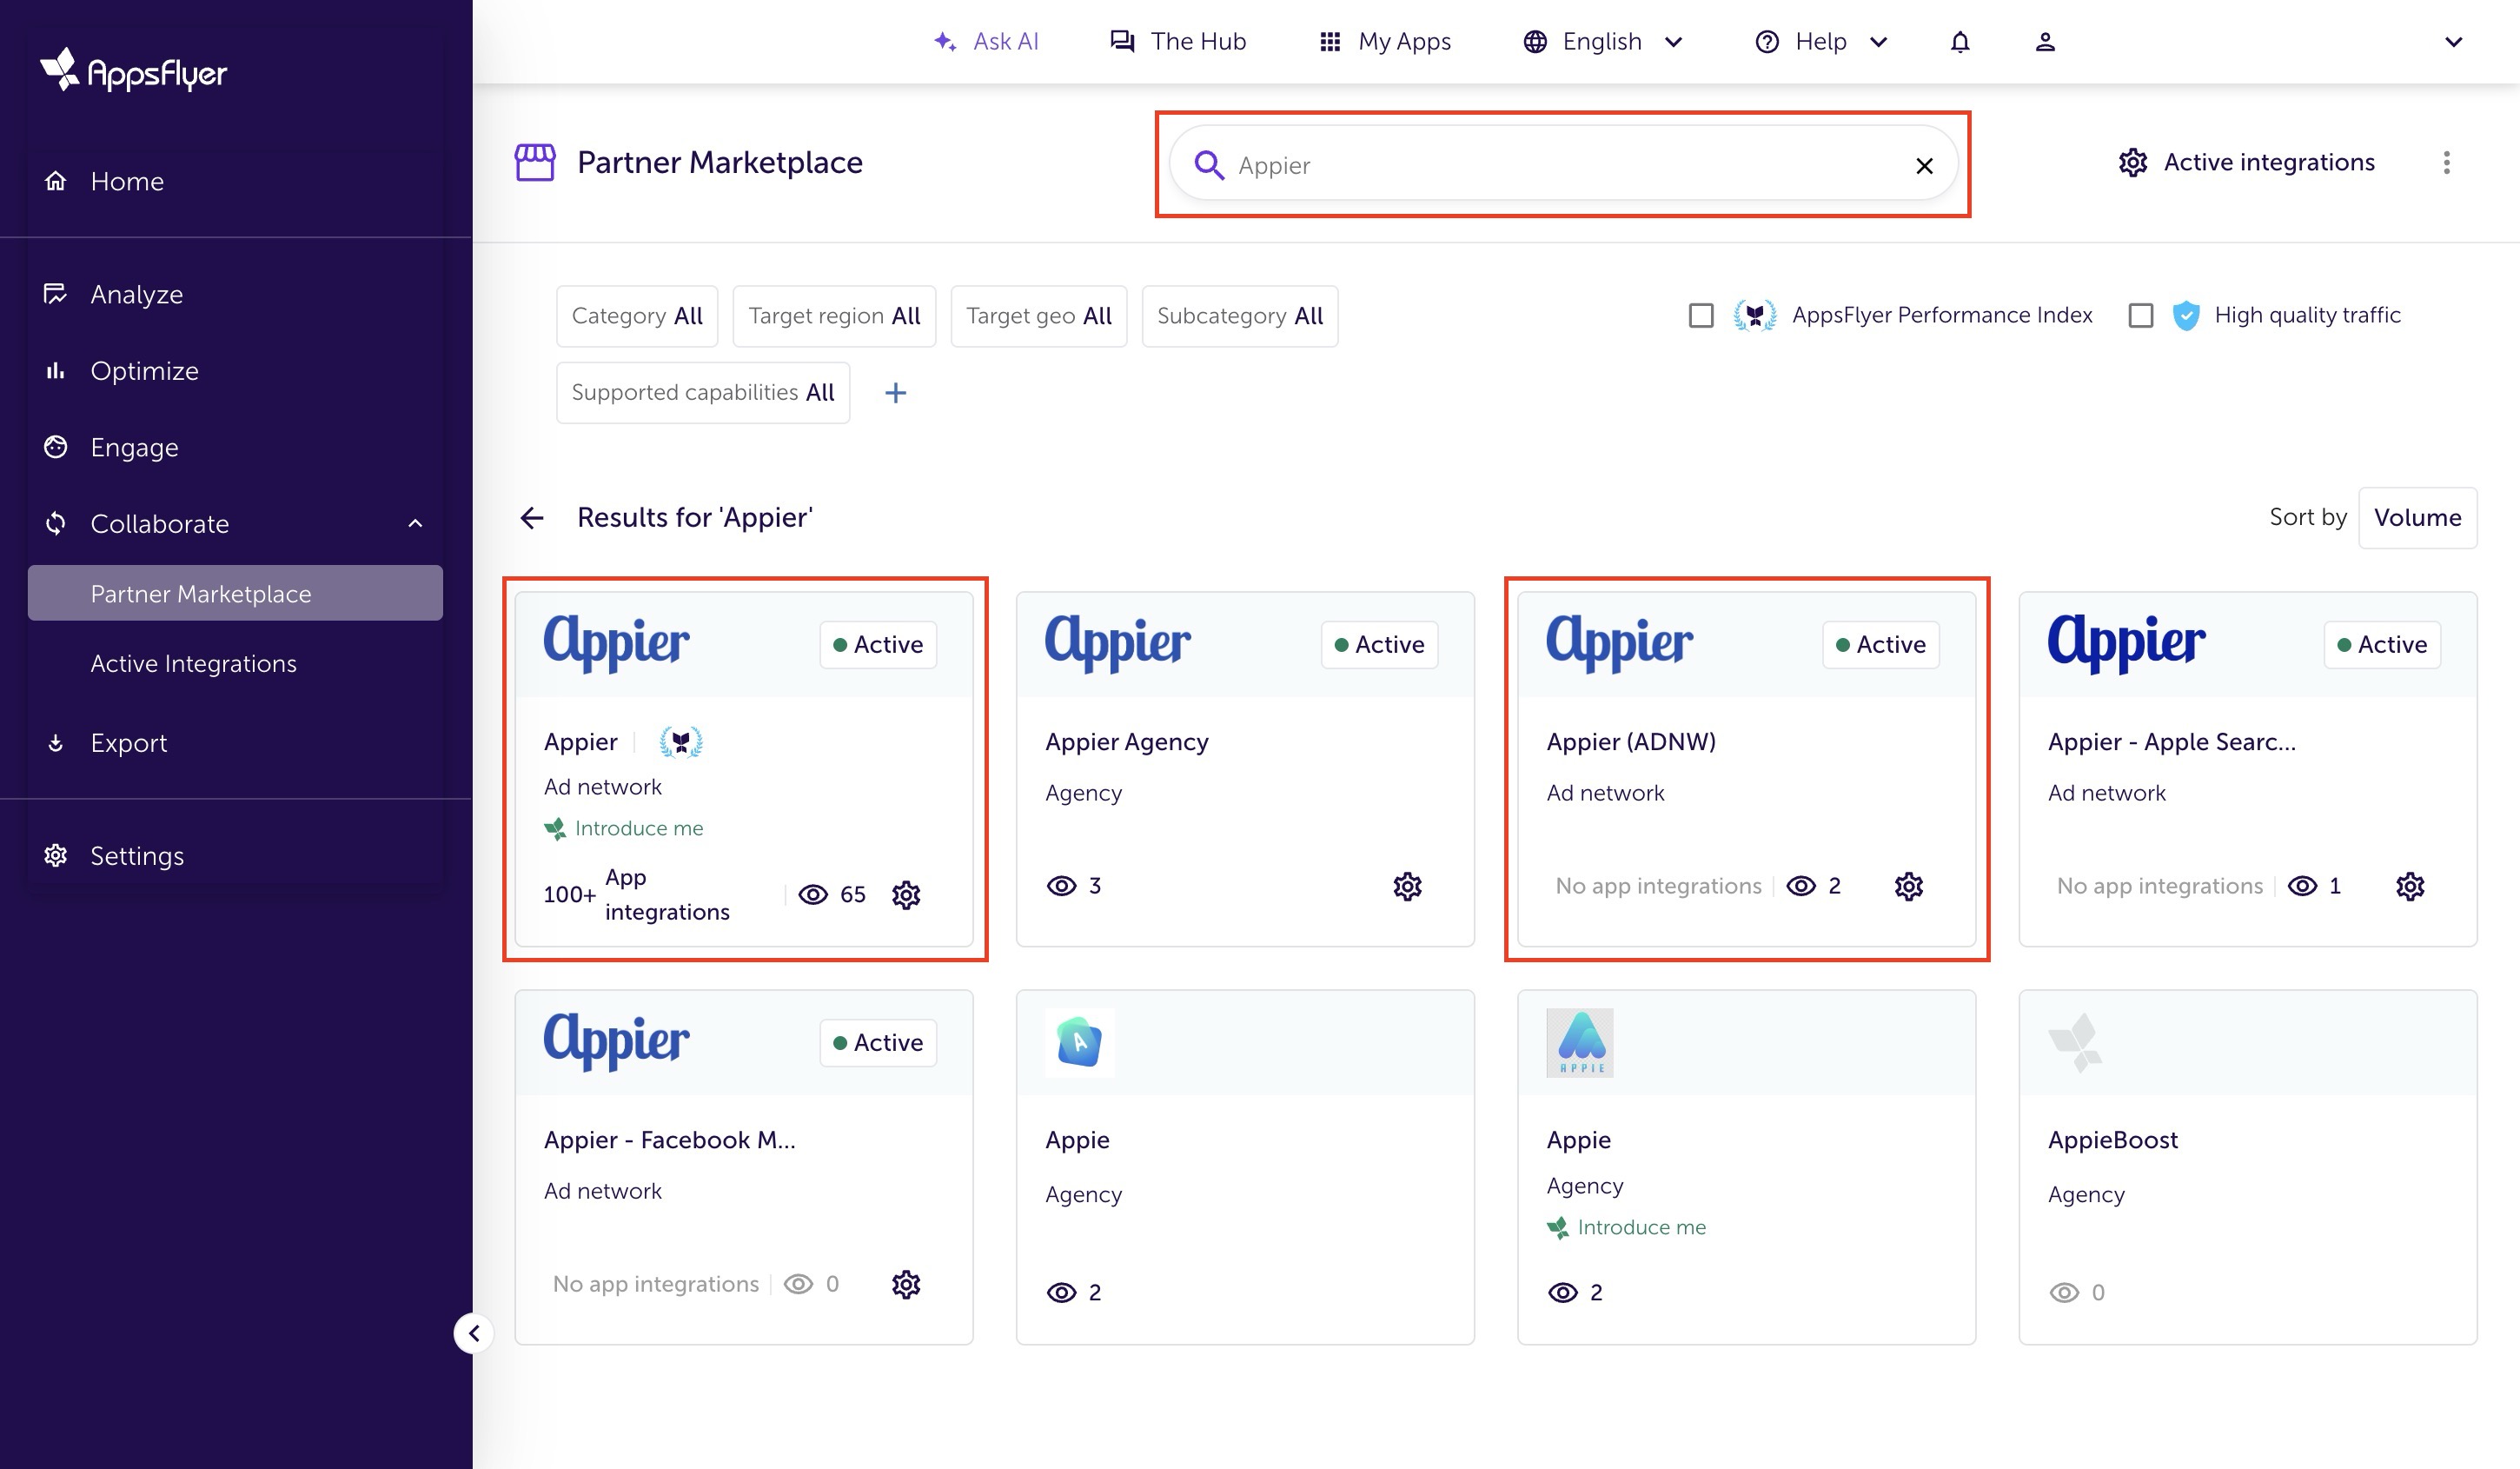
- Click "Manage integration" on the partner page
Configure postback settings
Appier needs AppsFlyer postback events set in order to measure optimize campaign performance.
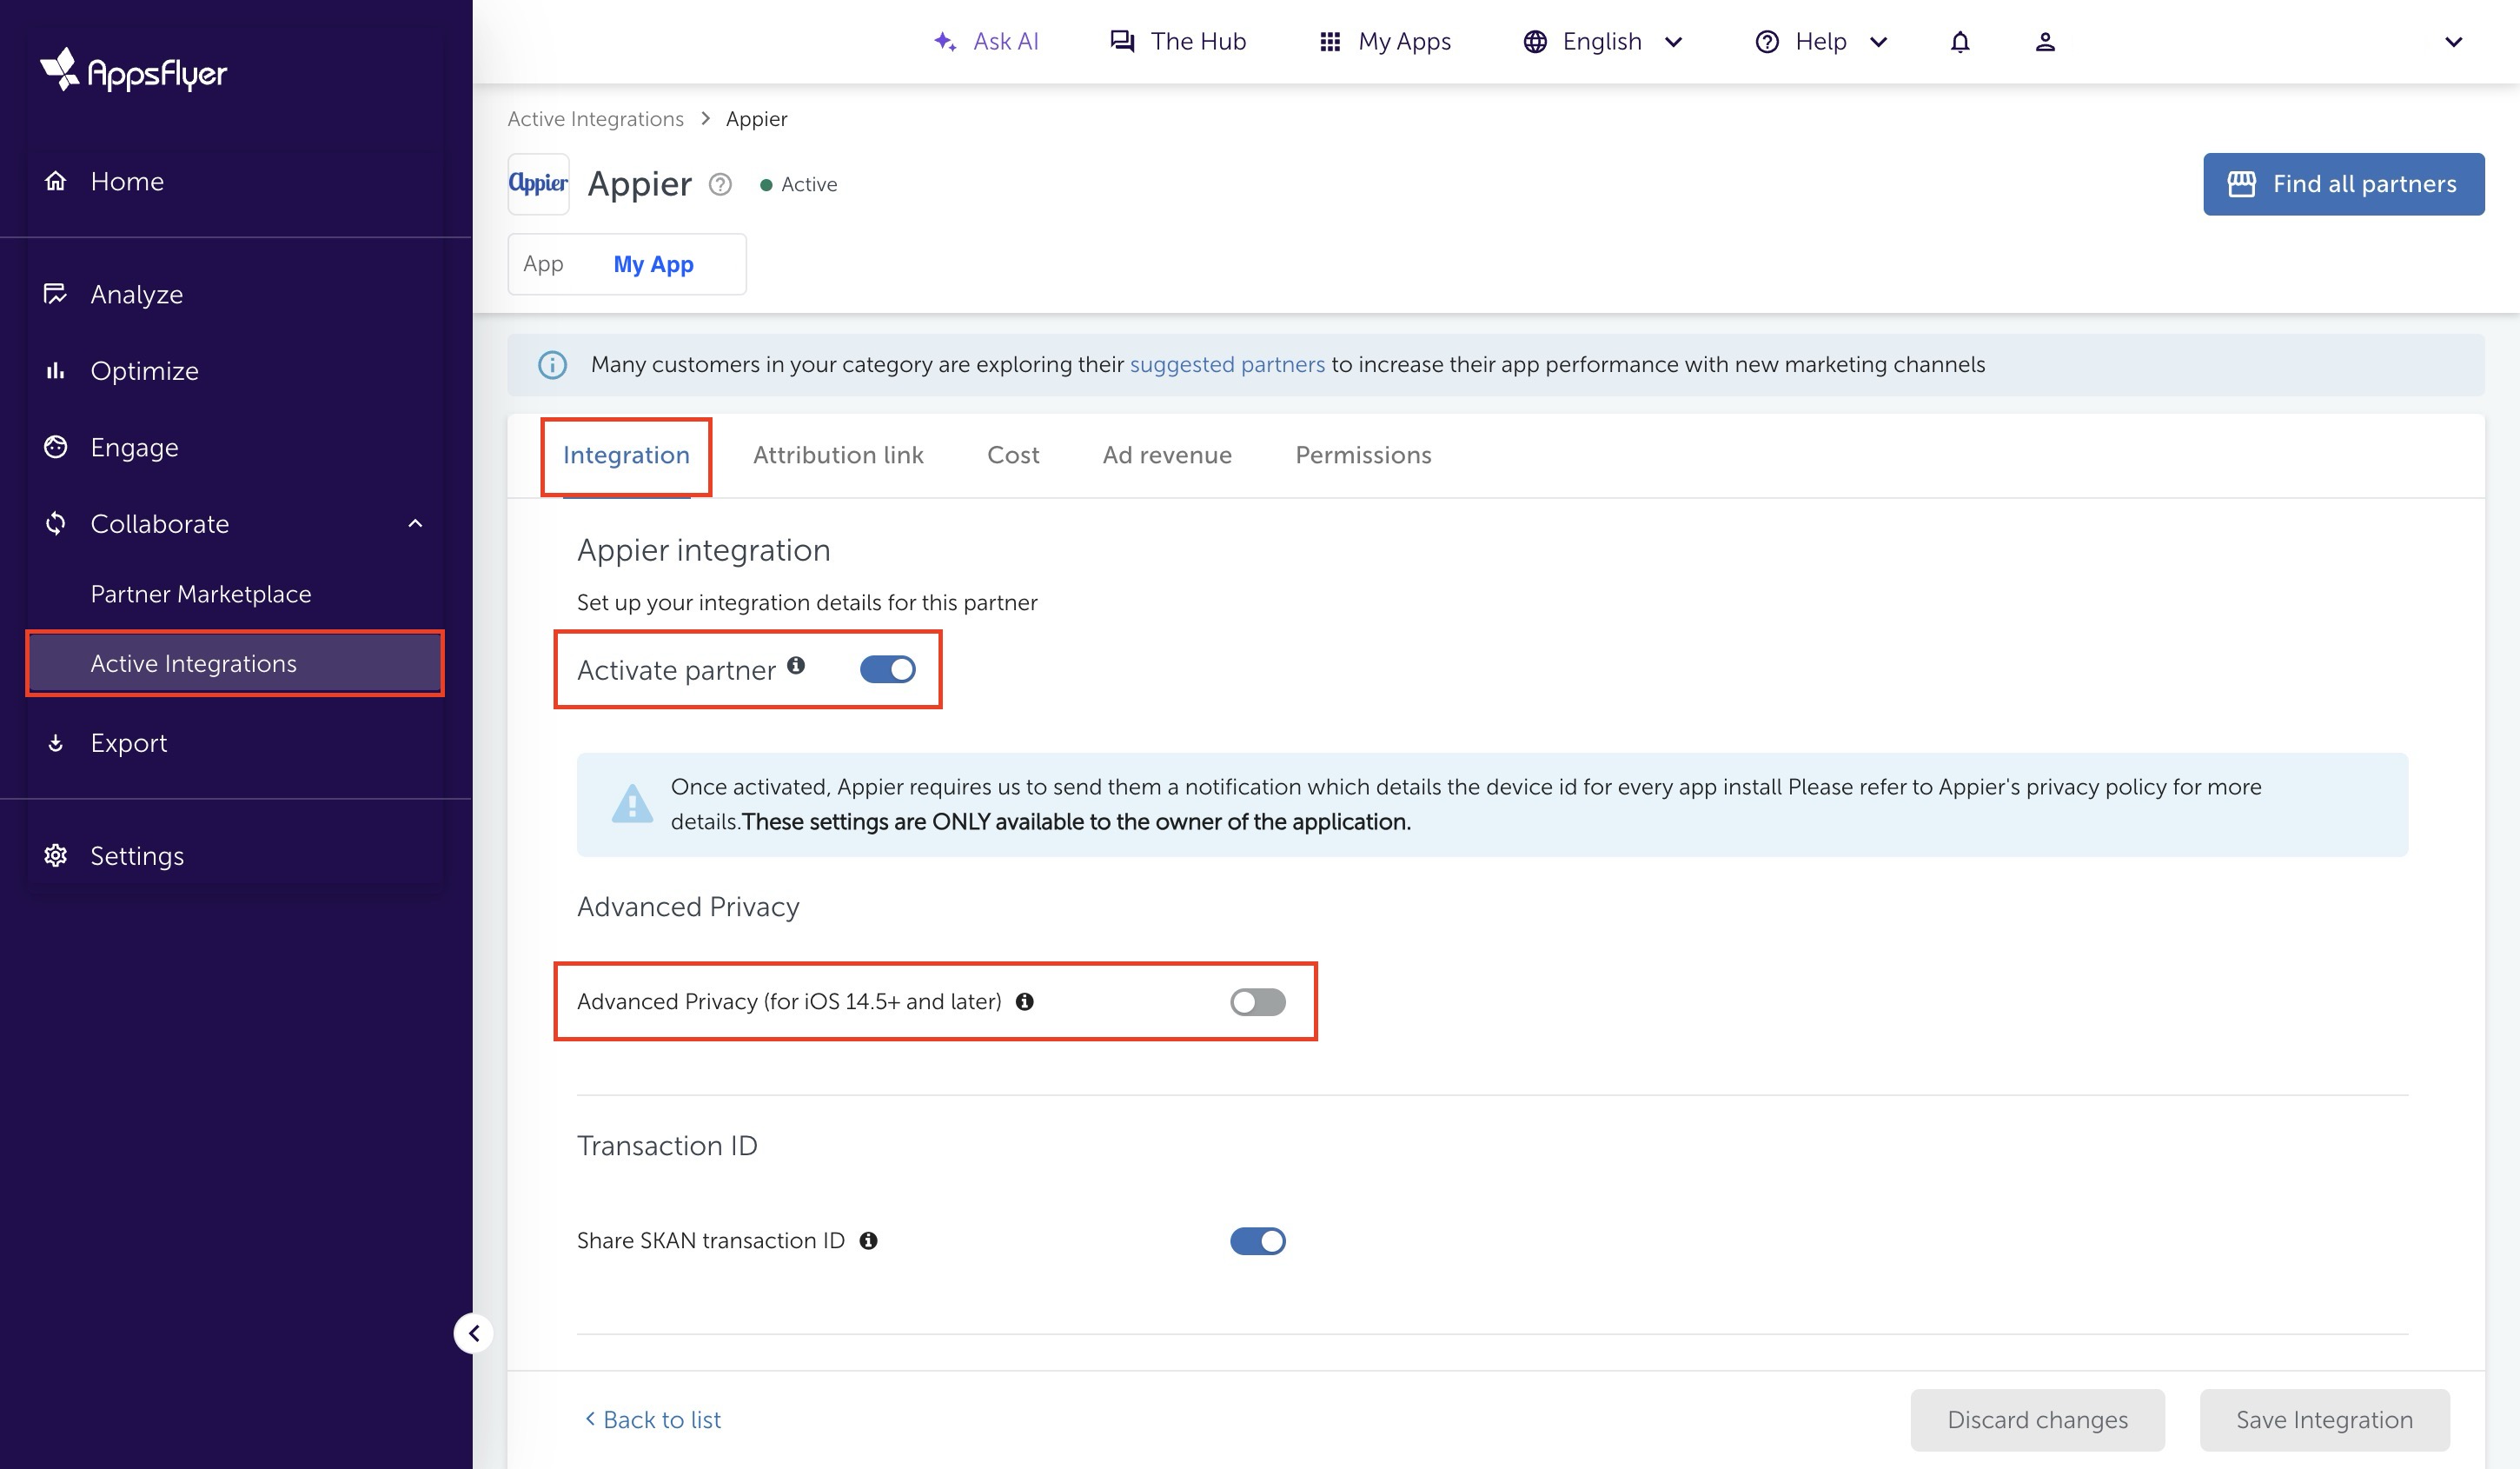
- Select Integration.
- Turn ON "Activate partner".
- Turn OFF "Enable Advanced Privacy (for iOS 14.5+ and later)".
- If the campaign will run view-through conversions, turn ON "Install view-through attribution".
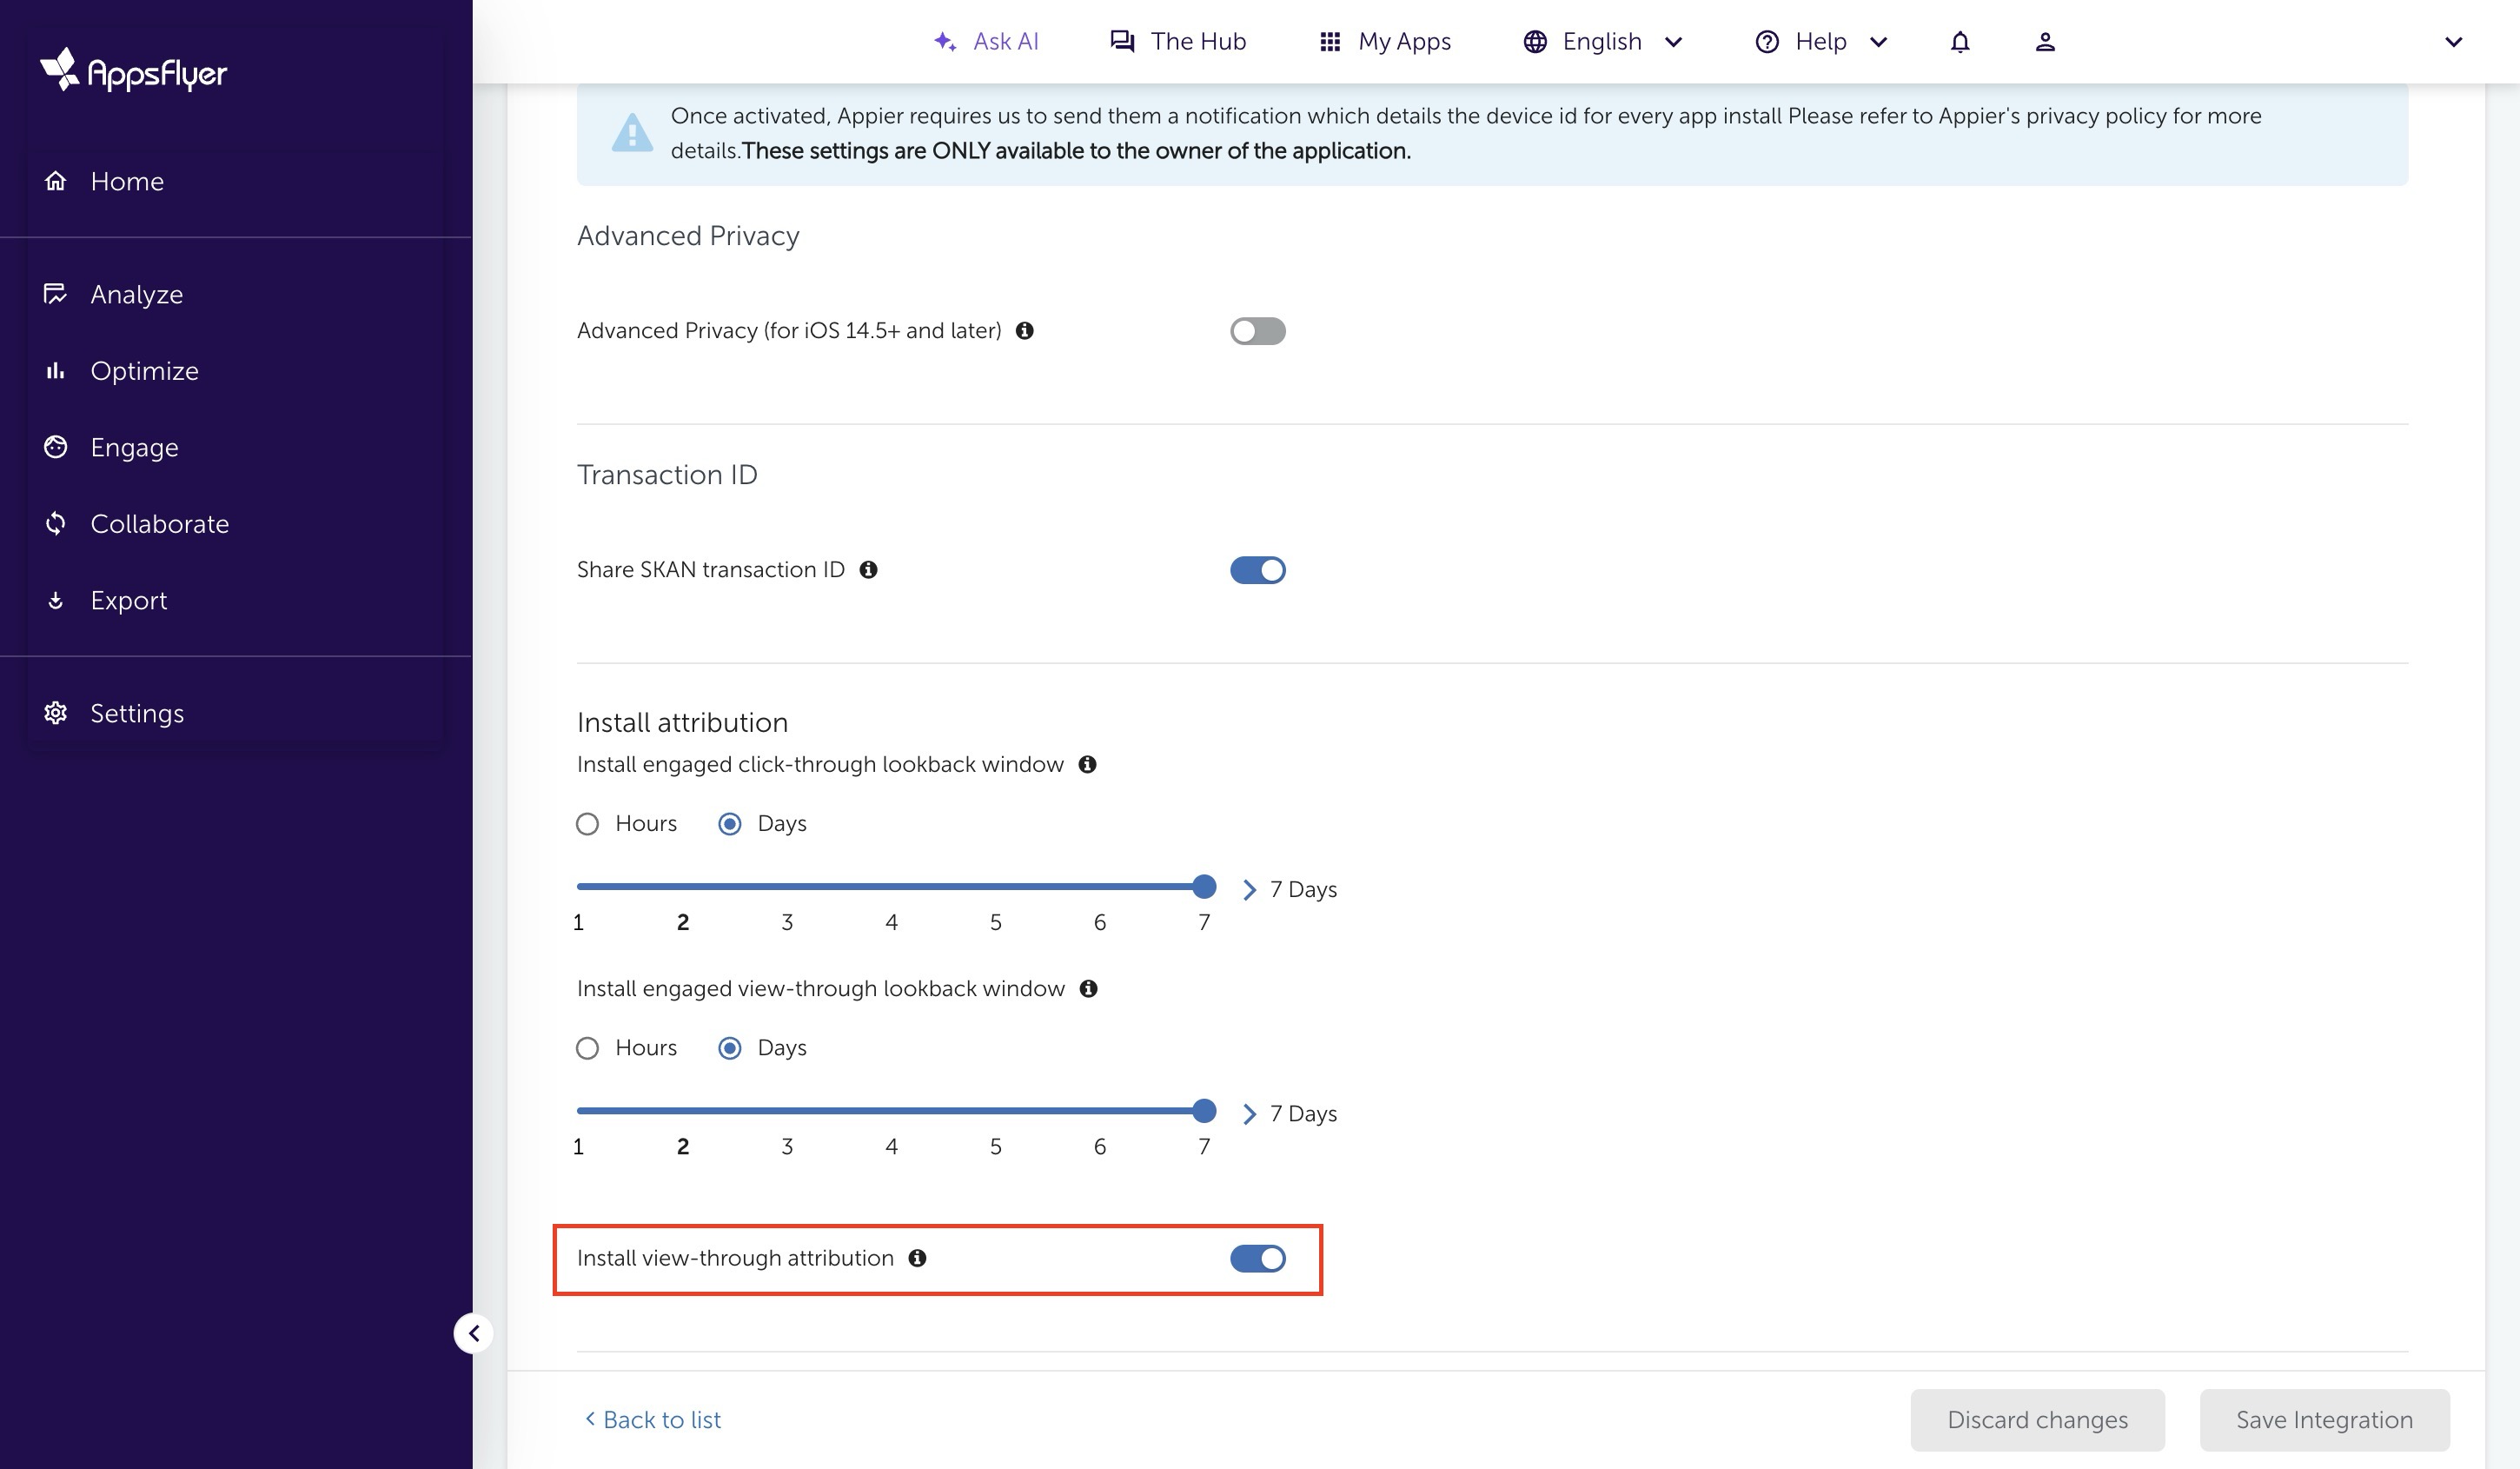
Screenshot 2 of 4
Please make a screenshot which shows the Install view-through attribution setting as shown above.
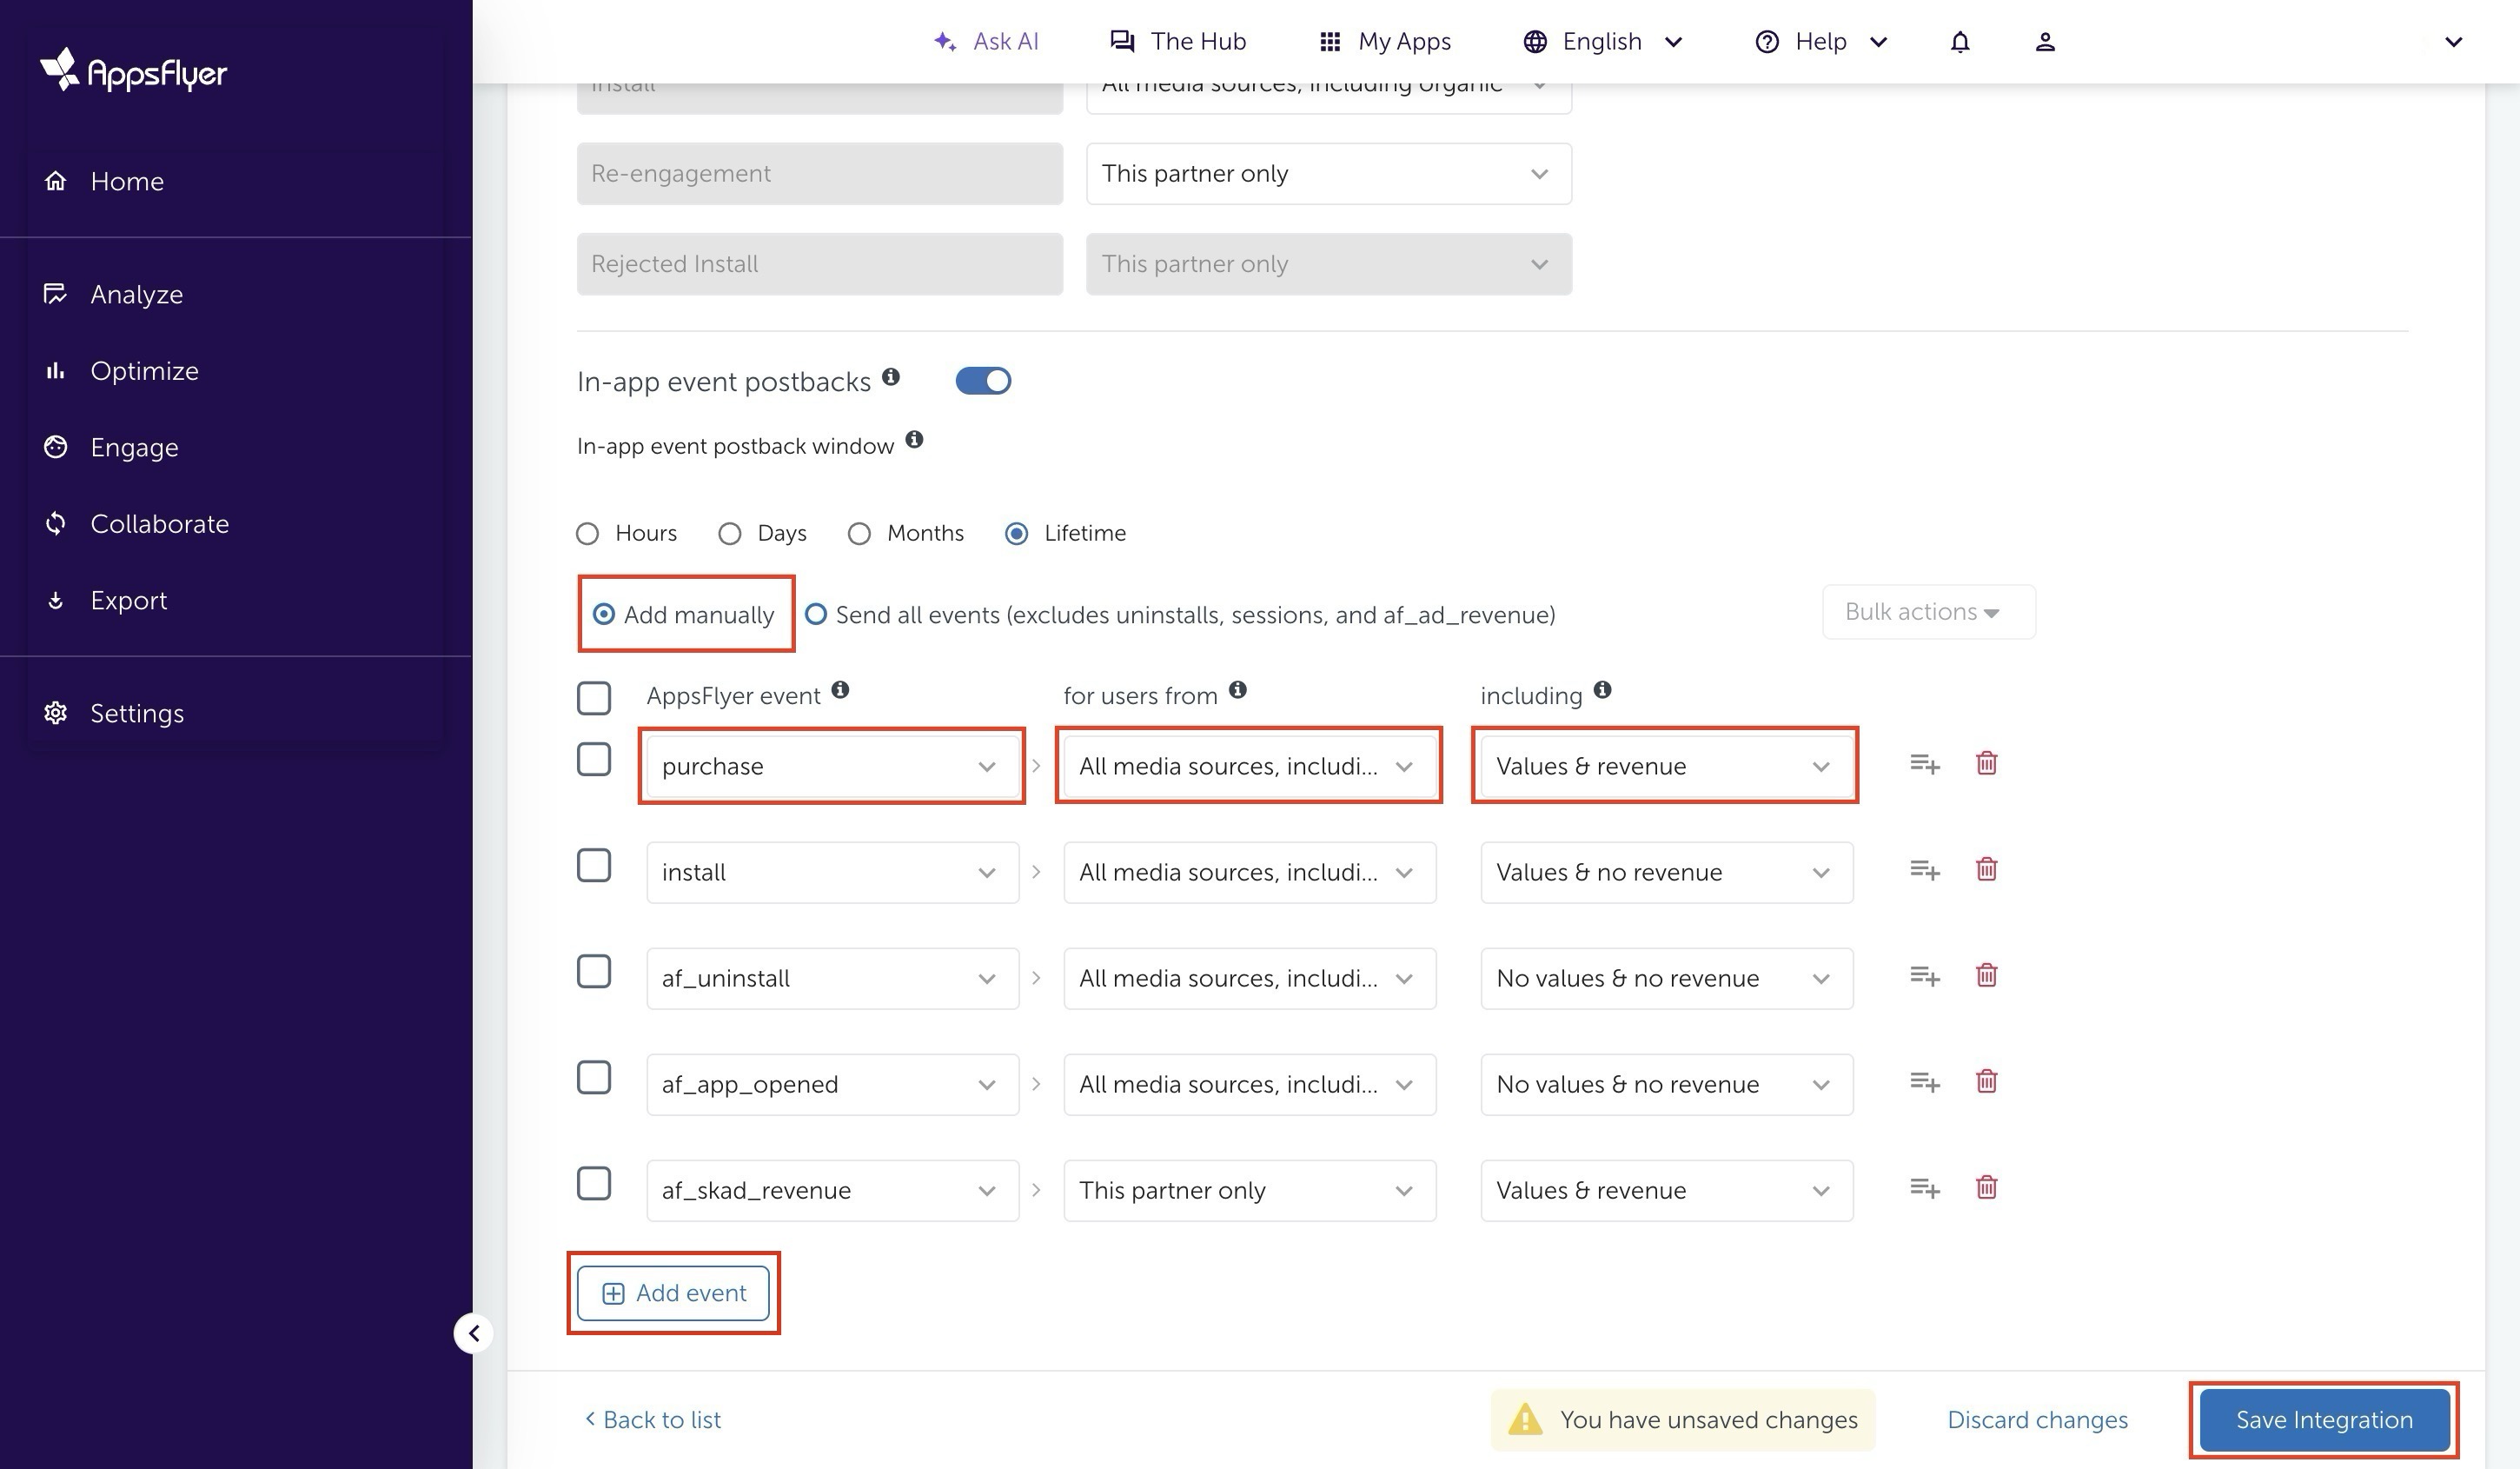
- Change the Sending option for Default Install postback to "All media sources, including organic".
- Turn ON "In-app event postbacks".
- Select Lifetime for Postback window.
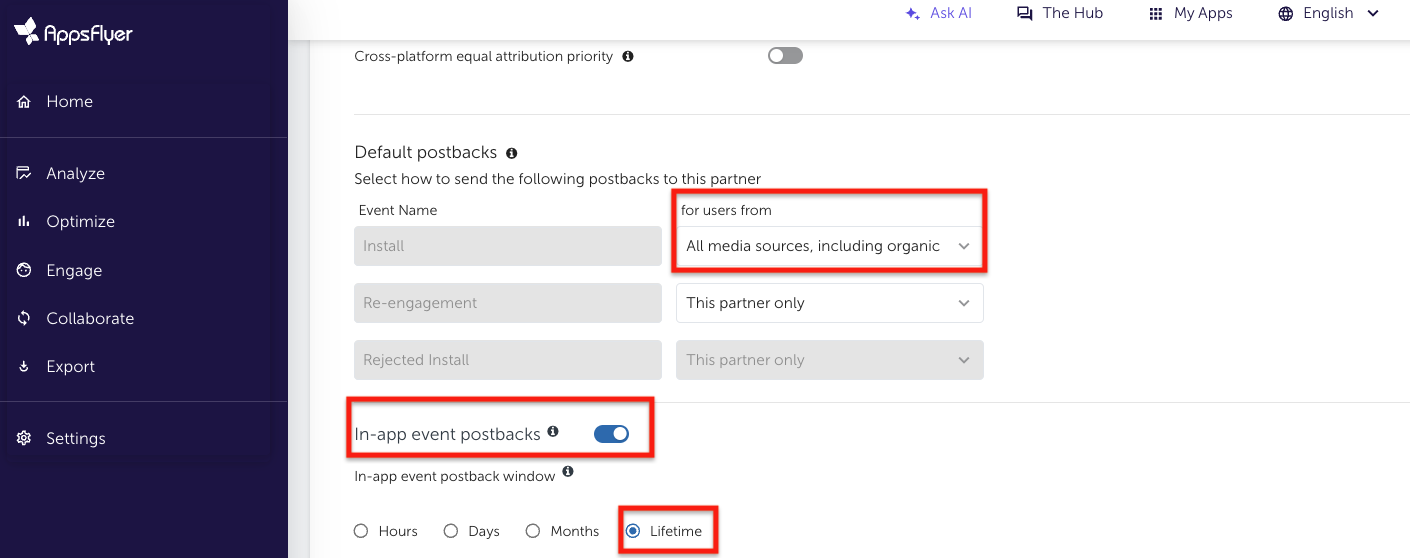
Screenshot 3 of 4
Please make a screenshot which shows the event postback settings as shown above.
Setting in-app event postback
- Choose "Add Manually".
- Choose "Add event".
- Choose all events that can be shared with Appier.
- Select "All media sources, including organic".
- Select "Values & revenue" if the KPI relates to ROAS.
- Save Integration.
Notes
If the campaign KPI is retention rate, af_app_opened postback must be added.
If the campaign KPI is CPA, the KPI event must be added.
If the campaign KPI is ROAS, the purchase event must be added and the "Values & revenue" sending option must be selected.
Screenshot 4 of 4
Please make a screenshot which shows each event's postback settings, as shown above.
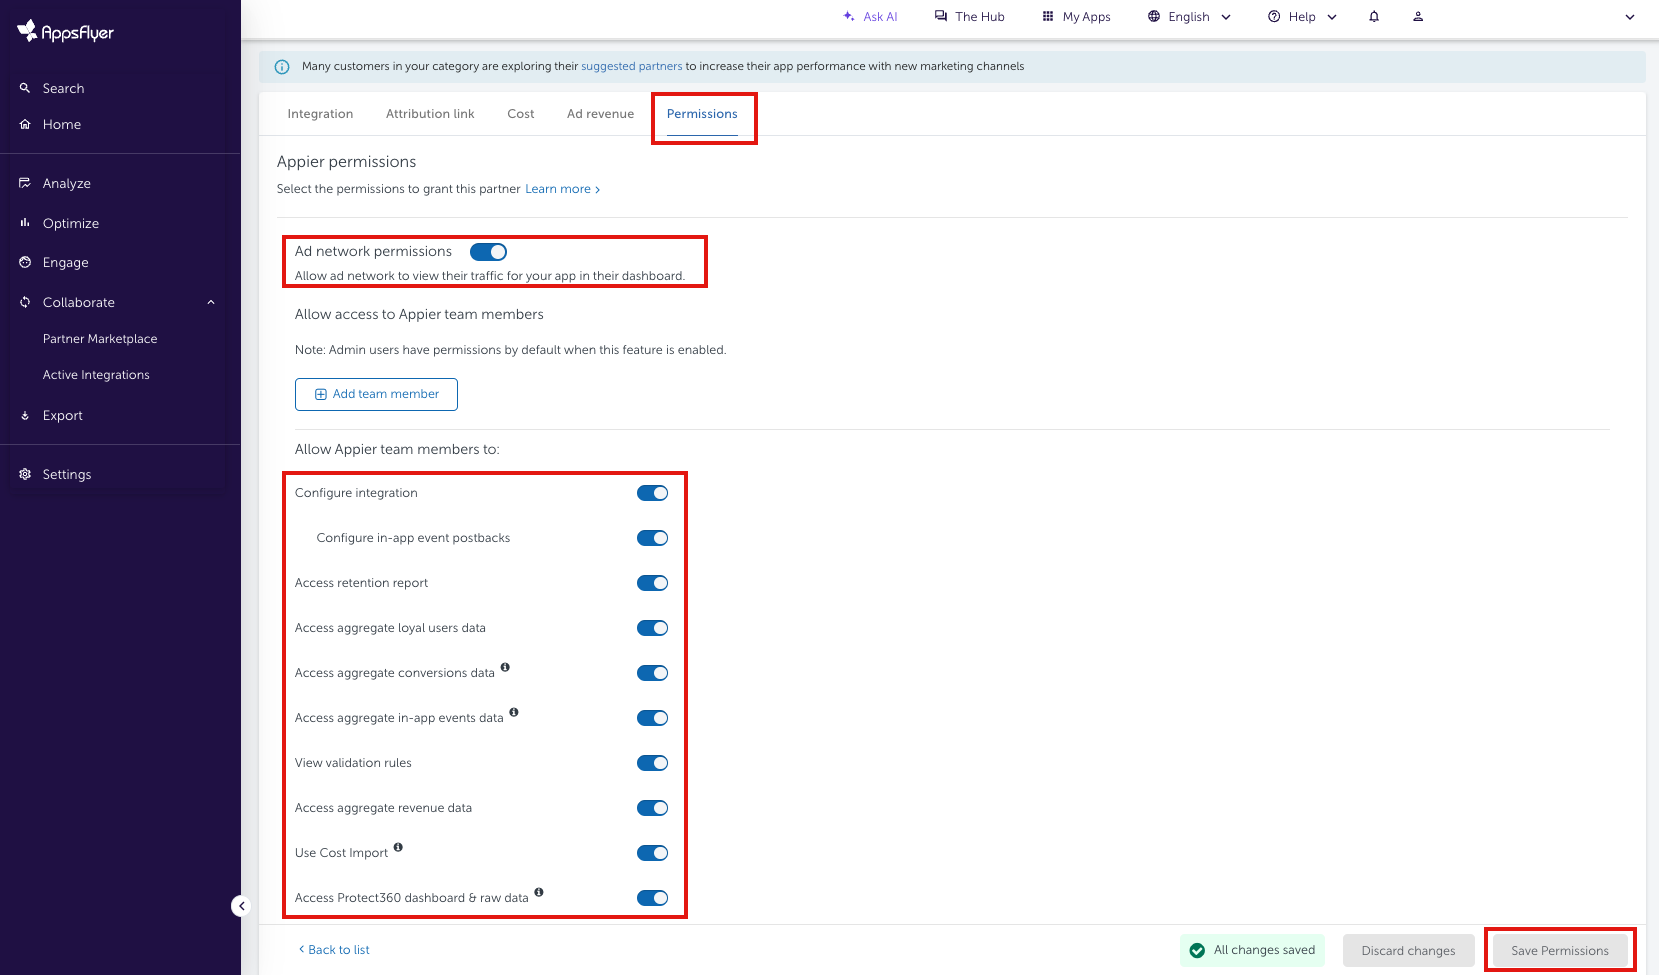
Account permissions
Sharing the following permissions to Appier will make it easier to onboard, optimize performance, and resolve any potential issues.
- Select "Permissions".
- Turn ON "Ad network permissions".
- Turn ON the following permissions (also shown the in the screenshot below).
- Configure integration
- Configure in-app event postbacks
- Access retention report
- Access aggregate loyal users data
- Access aggregate conversion data
- Access aggregate in-app events data
- Access aggregate revenue data
- Use ad spend ingestion
- Access Protect360 dashboard & raw data
- Access ad revenue raw data
- Save Permissions.
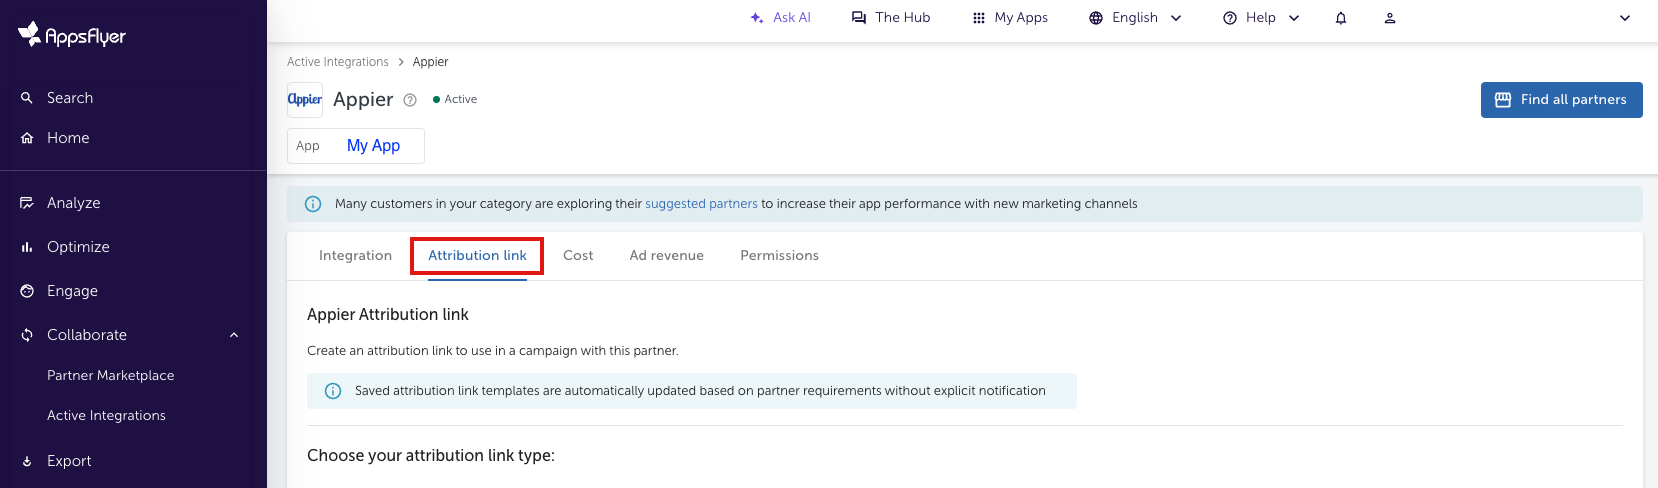
Generate links
Generate the link that will be used in the campaign in order for AppsFlyer to track and attribute events.
- Select "Attribution link".
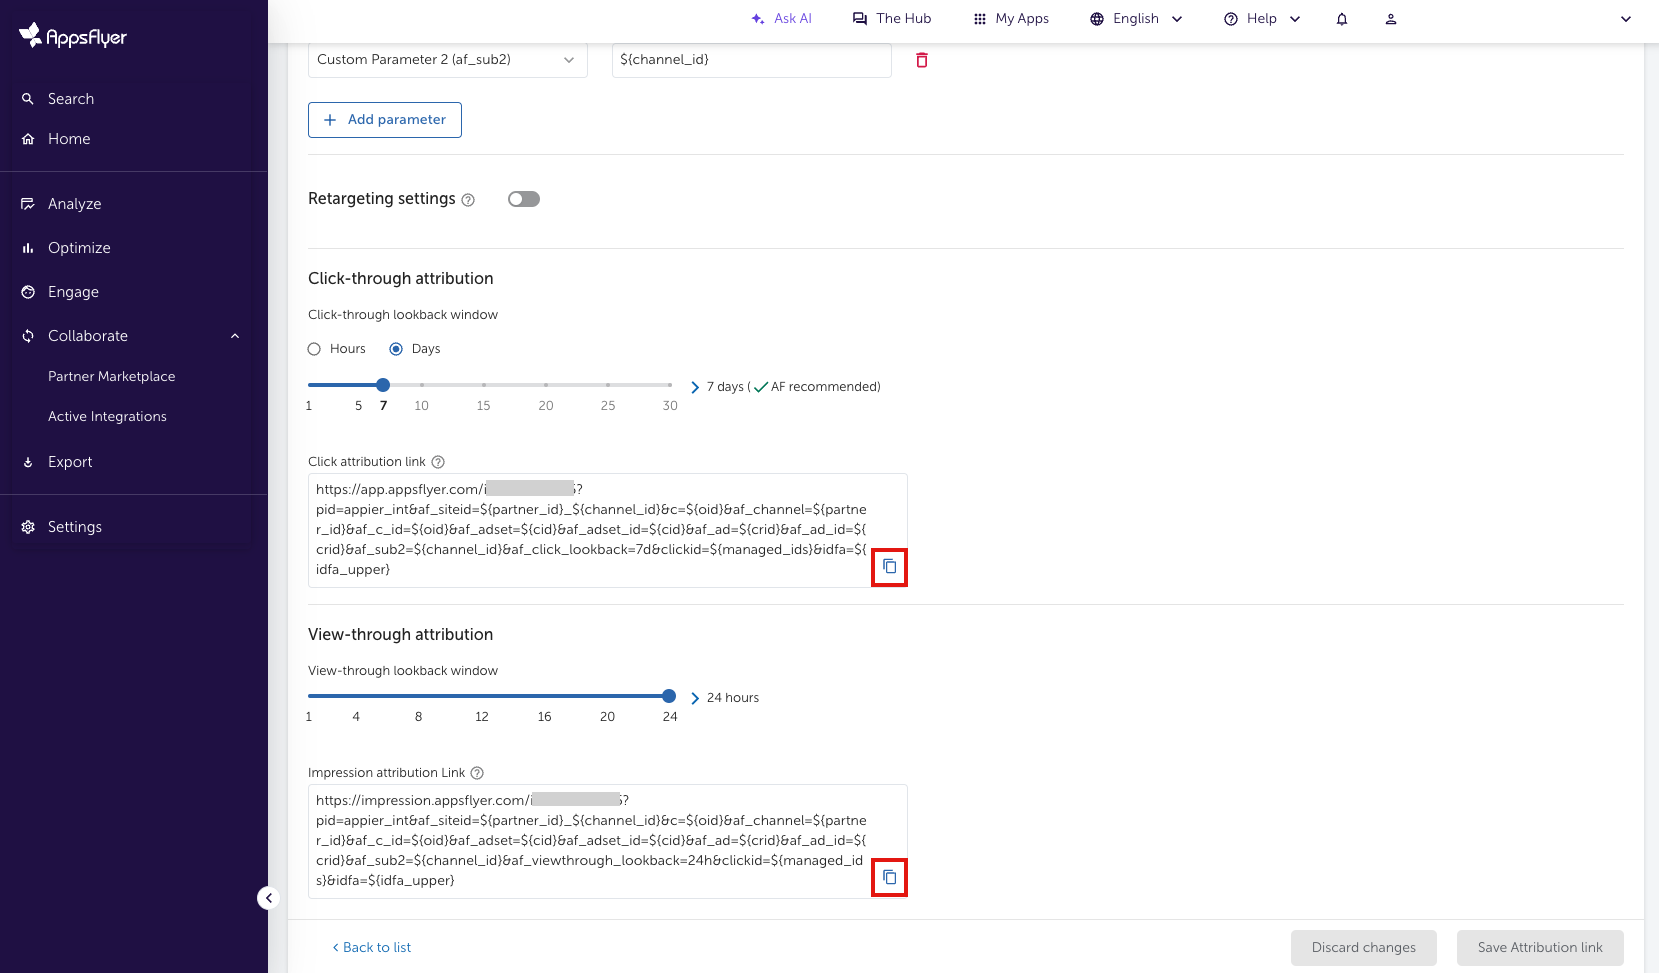
- Copy "Click attribution link" and provide it to Appier.
- For campaigns that will track view-through conversions, copy "Impression attribution Link" and provide it to Appier.
Note
Please do not use c, af_c_id, af_adset, af_adset_id, af_ad, and af_ad_id parameters to specific values if you want to use "cost API" or "Aggregated Advanced Privacy" mode.
Note
For new user campaigns, please generate the standard AppsFlyer links as described in this guide. Standard links use the URL domains
app.appsflyer.comfor click attribution links andimpression.appsflyer.comfor impression attribution links. Please do not generate OneLinks for the campaign, but if your campaign requires OneLinks, please describe your goals to Appier.
Term explanations
-
Attribution Link Parameters:
Adding different c-parameters to different links allows you to breakdown performance along criteria of your choice in AppsFlyer reports. Please check with your Appier Account Manager if you have any questions. -
Click look-back window:
A look-back window is the period of time after an ad is clicked or viewed within which an install can be attributed, or matched, to the ad. Advertisers and attribution providers use lookback windows to determine if a specific click or view led to a user’s decision to download an app.
Updated over 1 year ago