AppsFlyer - Facebook/FMP Retargeting Settings
Note
- Only the advertiser account (who own the app) has permission to set up the Facebook setting.
- Agency account cannot adjust the setting.
- Please set this page only if you will run a Facebook app install campaign with Appier.
Screenshots
In the following guide, there are 3 dashboard screens that require screenshots.
Please make these screenshots and provide them to Appier.
Providing accurate screenshots helps speed up and ensure the quality of your campaign onboarding process.
Check App settings
Check each setting under App settings is correct
- Click "App Settings" on the App main page.
- Turn OFF "Aggregated Advanced Privacy" (iOS Only).
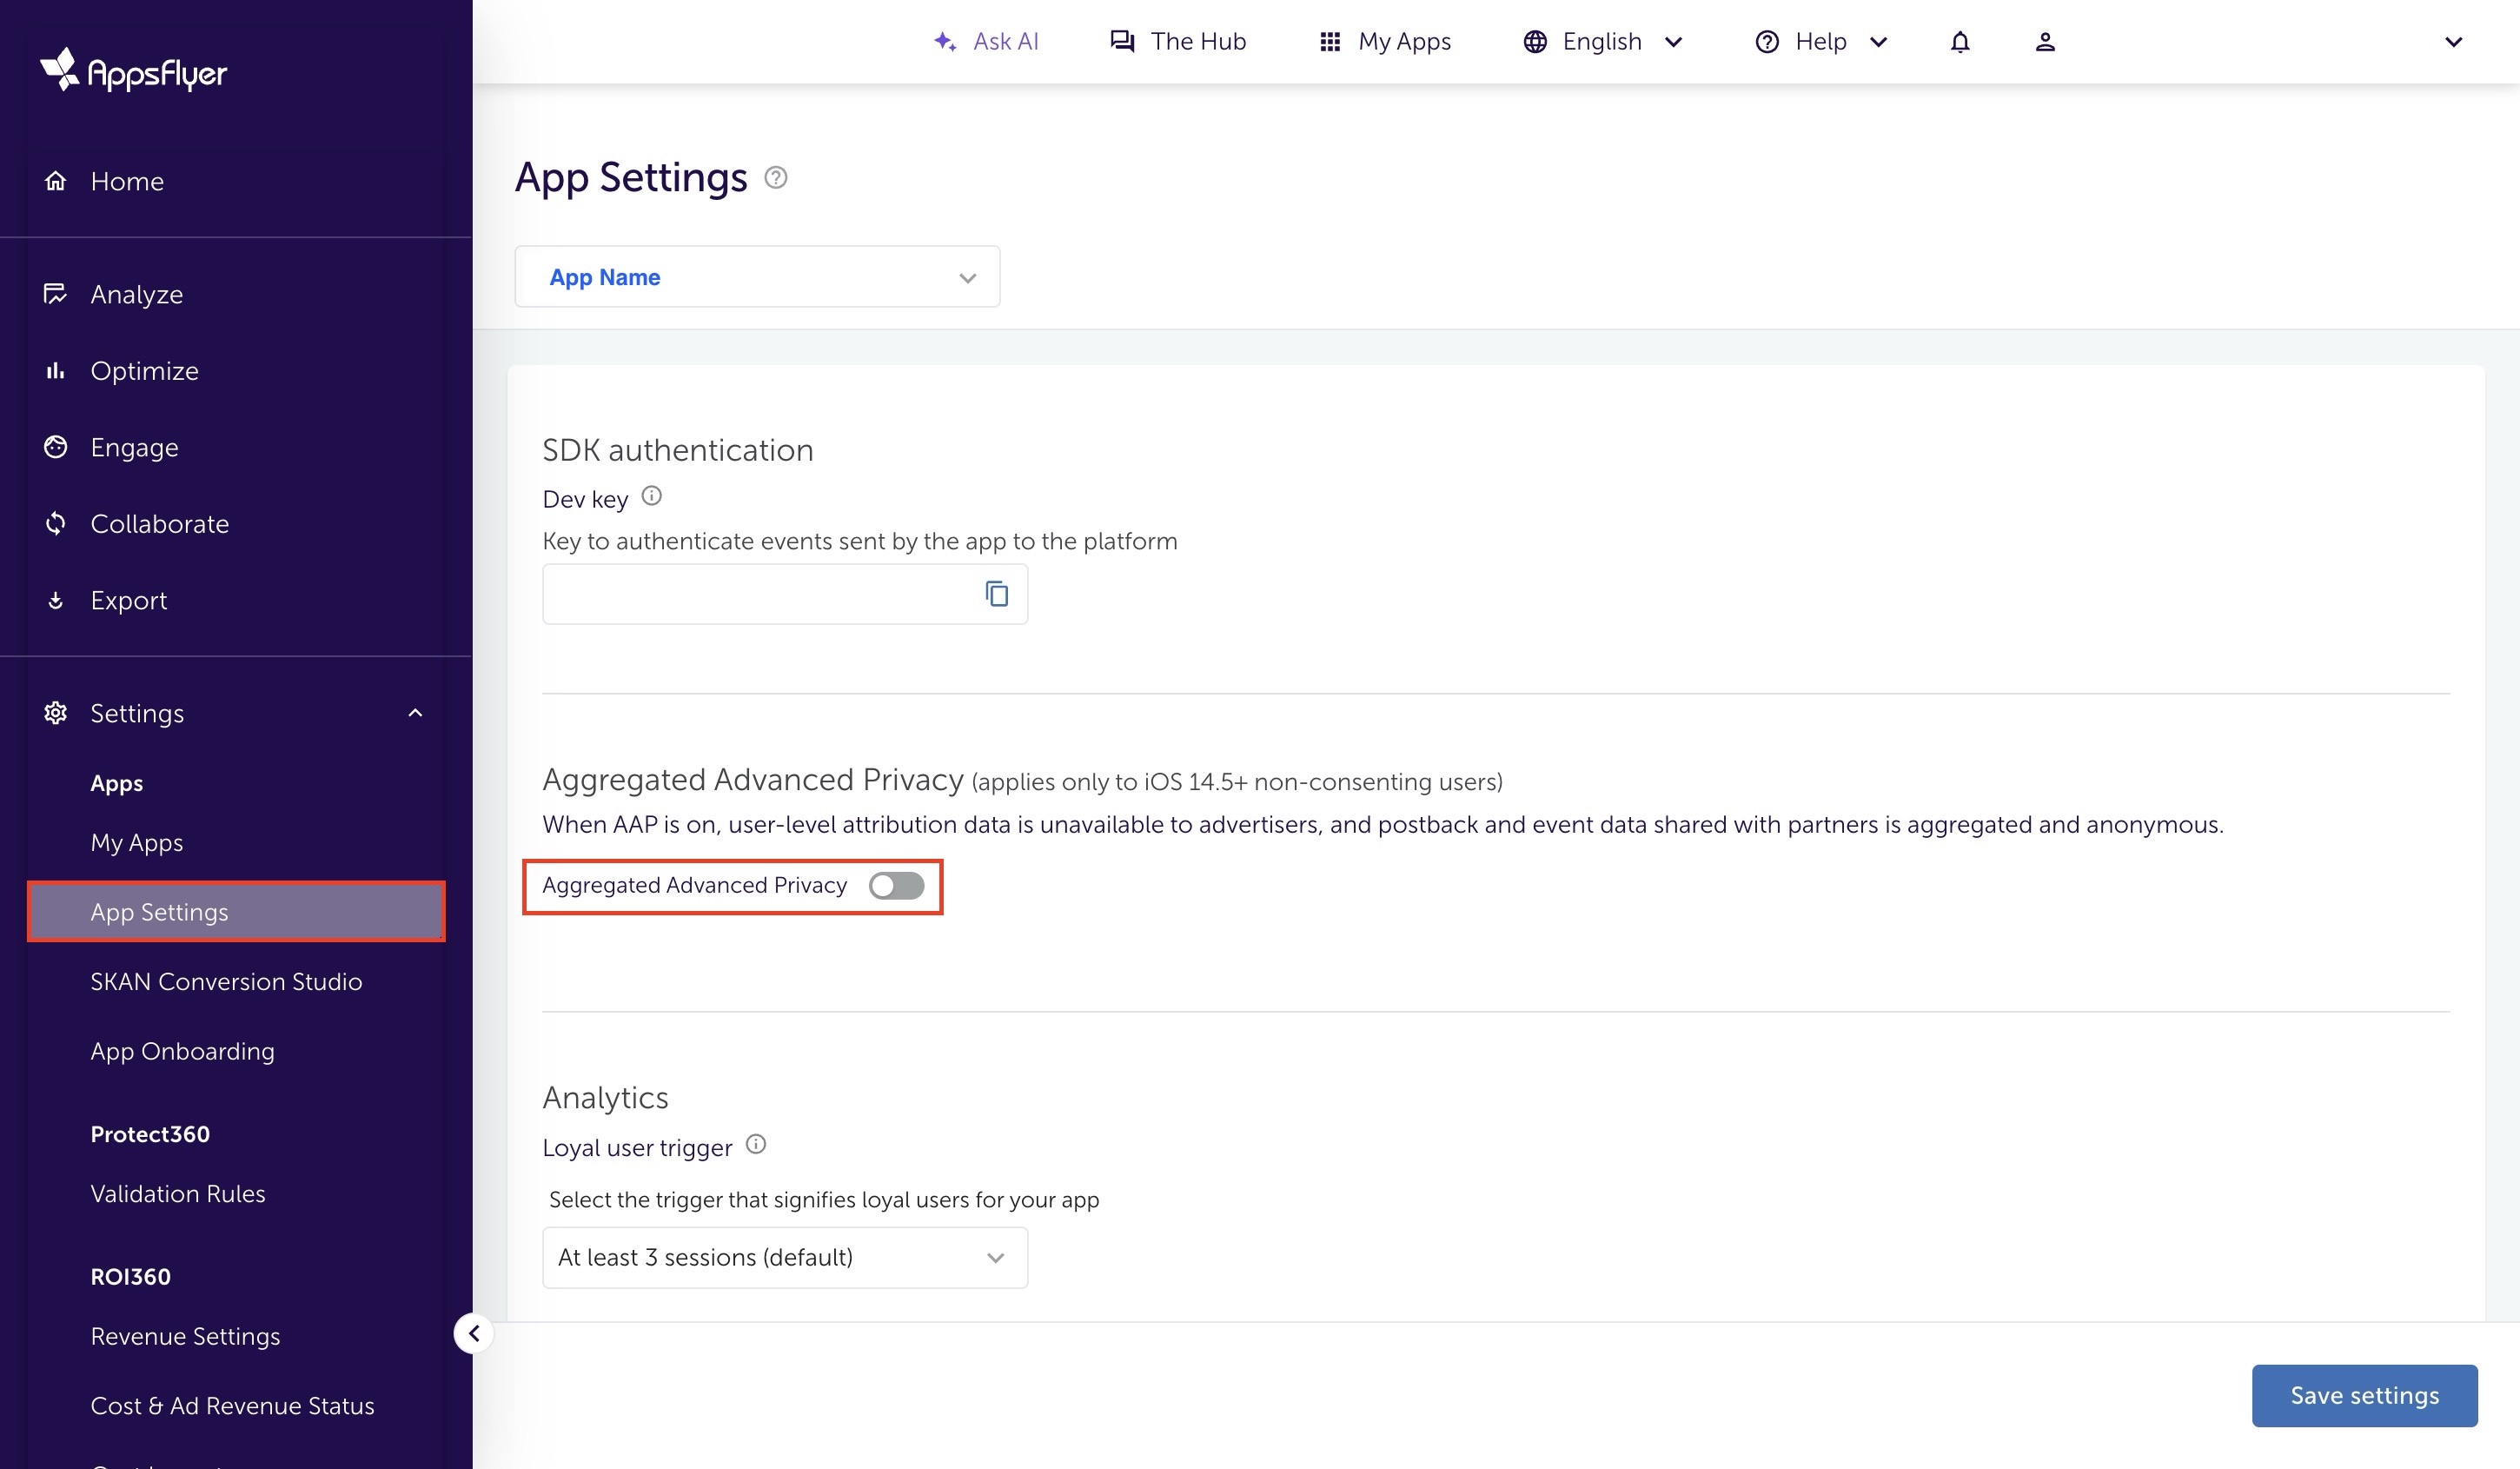
- Enable "View-through attribution via probabilistic modeling" for both OS if you want to run view-through attribution.
Note
- Note that if running on both iOS and Android, each app has its own App Settings page that will need to be set.
- Appsflyer Guideline also recommends advertiser to enable View-through attribution via probabilistic modeling.
- Turn ON "Enable retargeting attribution".
- Select "None".
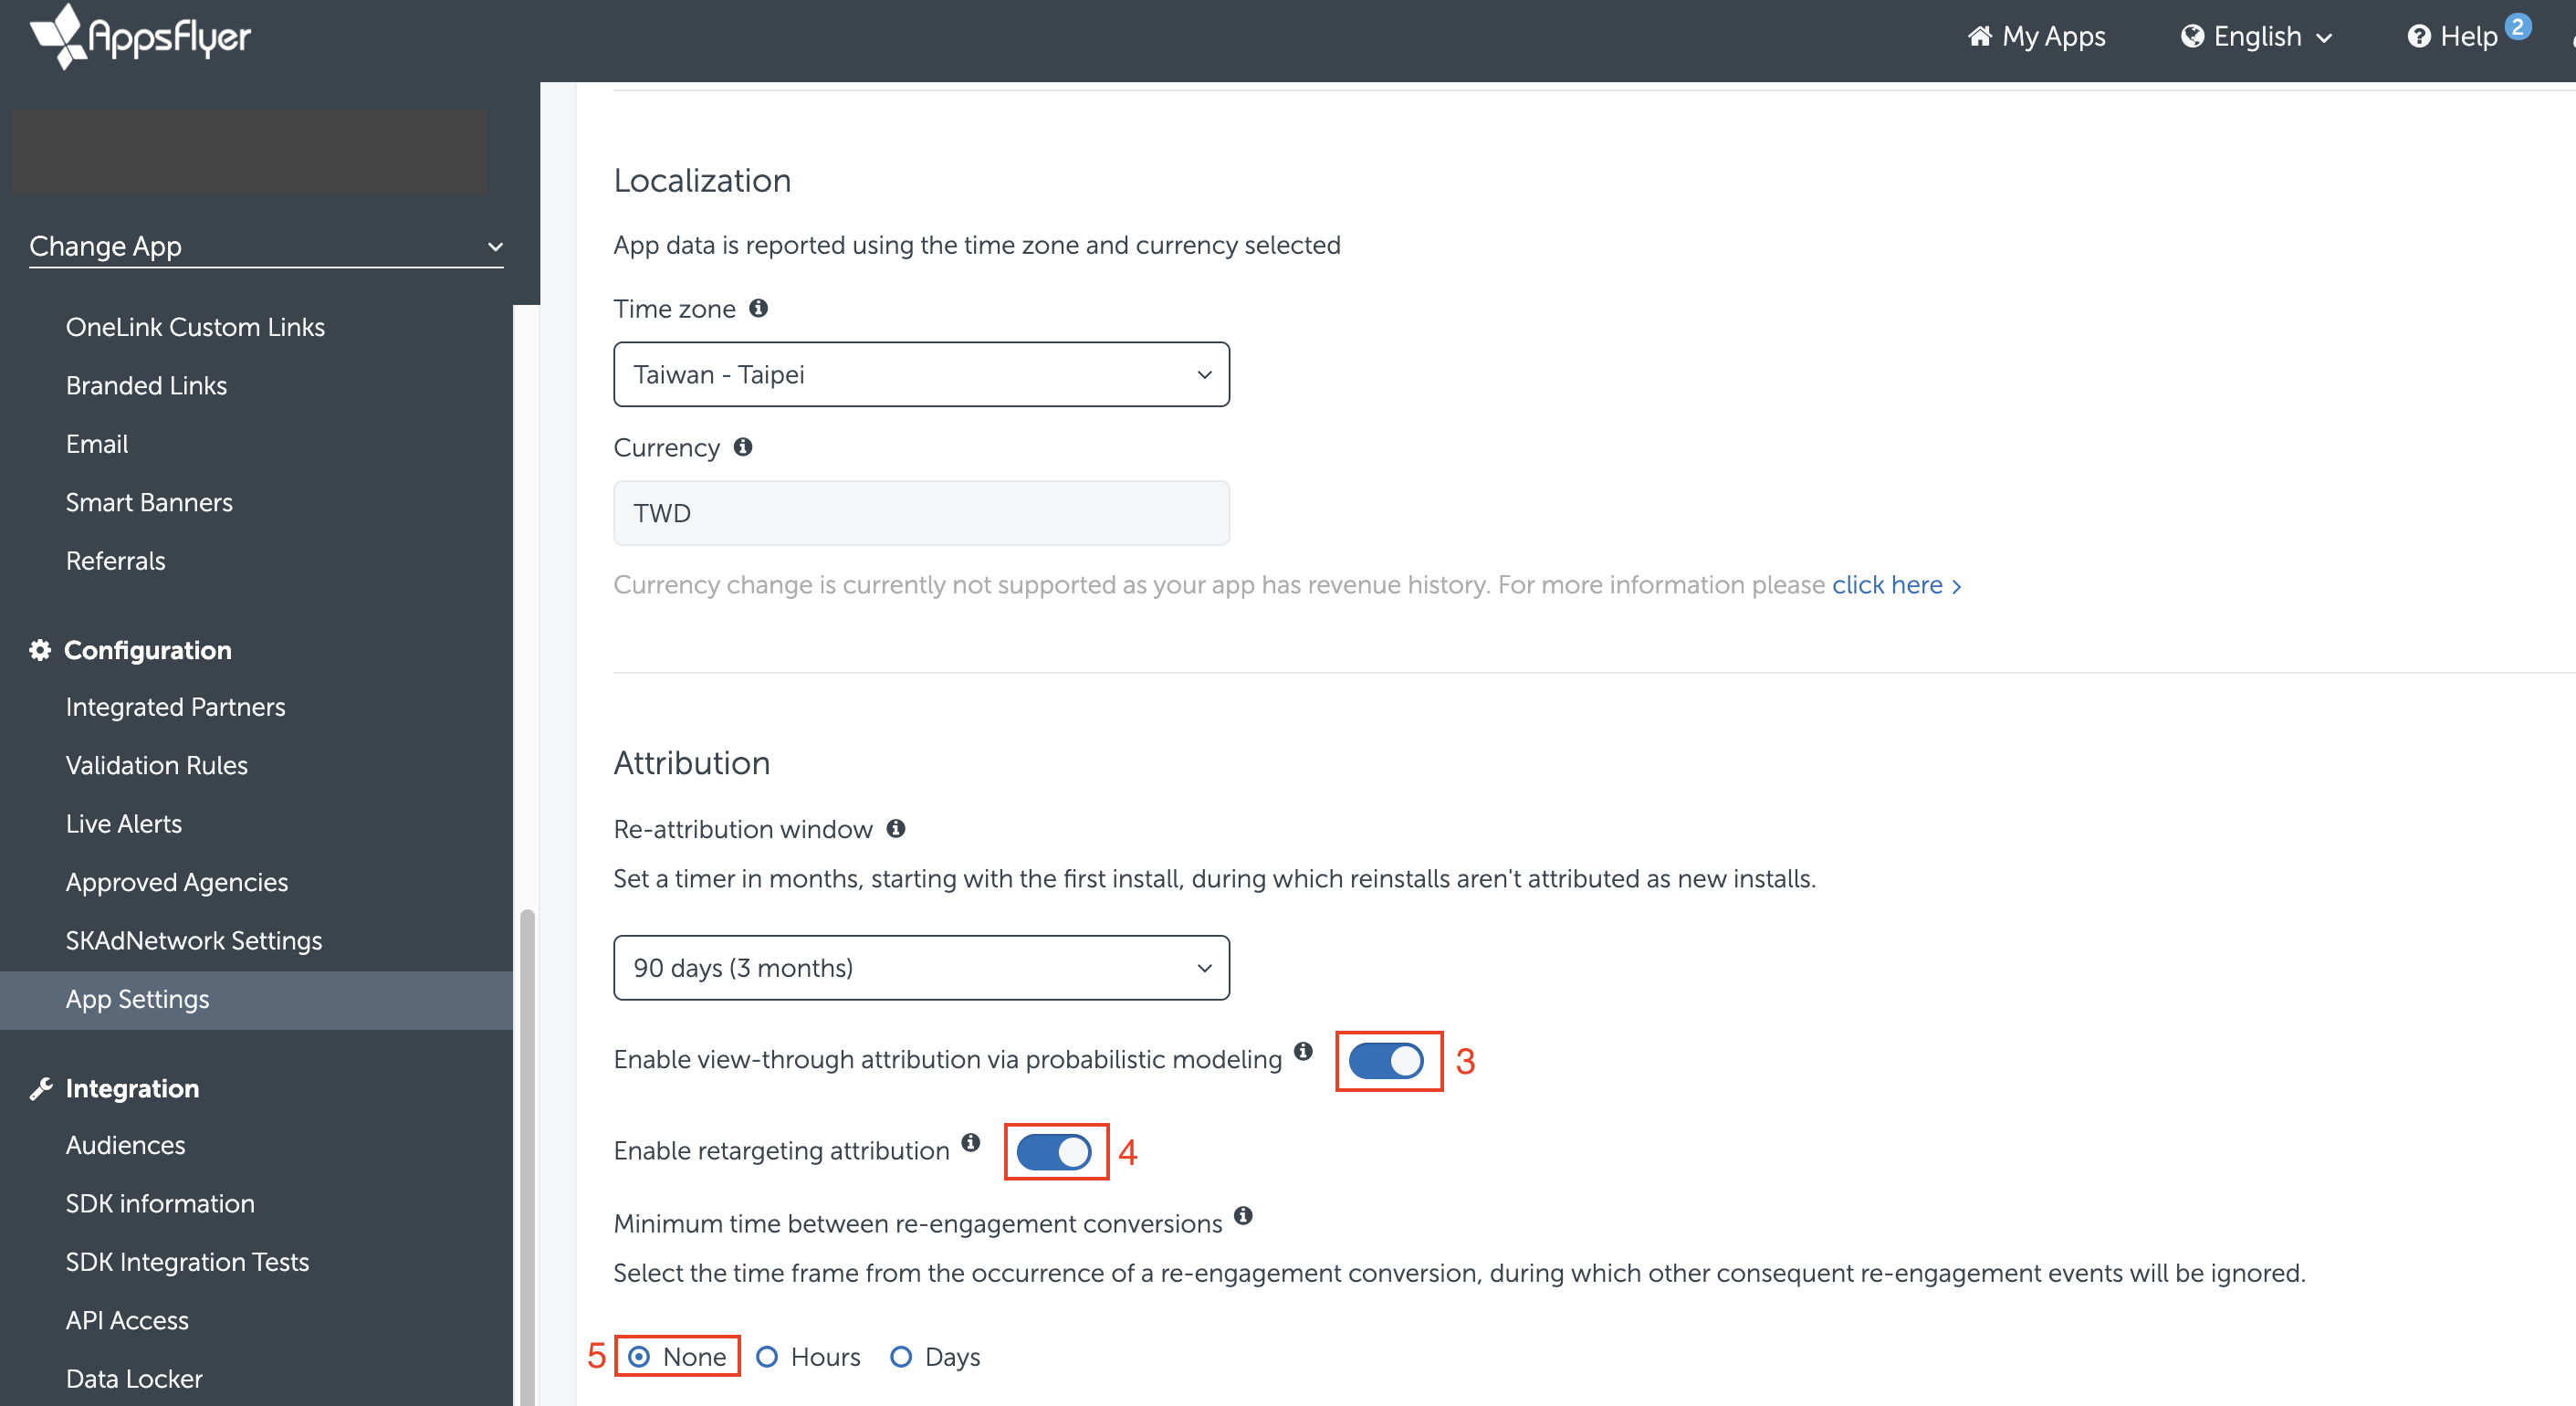
Screenshot 1 of 3
Please make a screenshot of the App Settings page, as shown above.
Appsflyer & Facebook integration
Find Facebook module
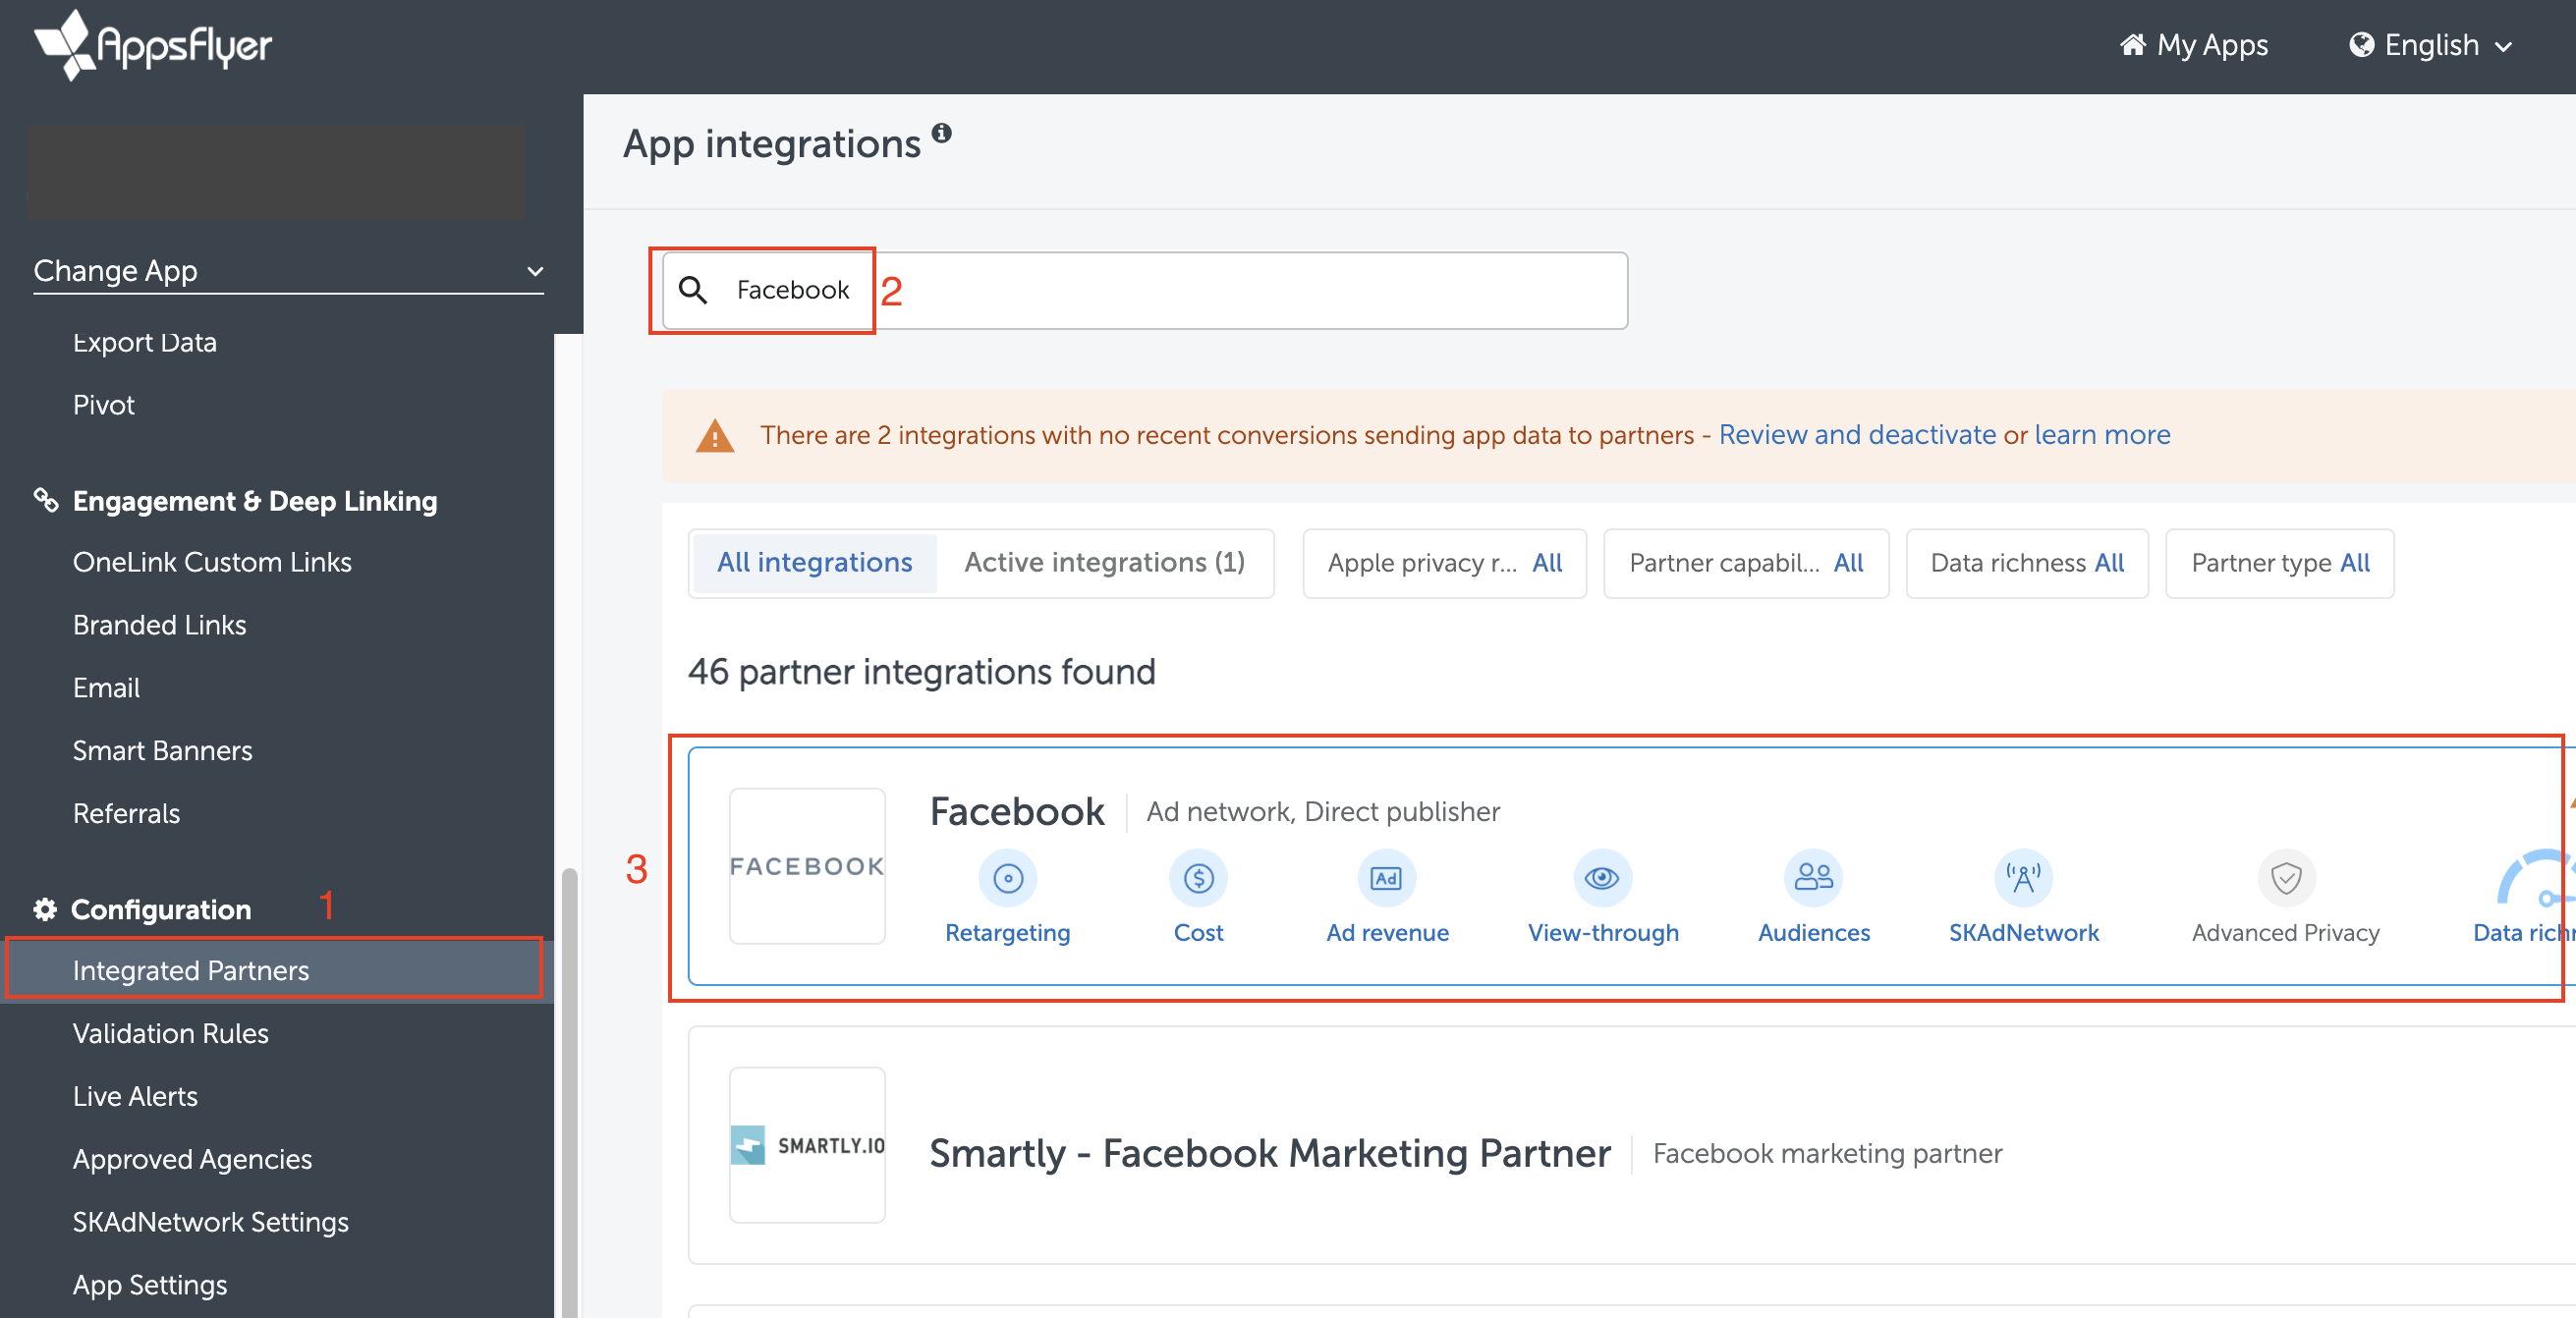
- Click Integrated Partners on the app's dashboard menu.
7. Search for "Facebook" in the search bar.
8. Select "Facebook (Ad Network, Direct publisher)".
FB module setting
- Select Integration.
- Turn ON "Activate partner".
- Please click the "Facebook Terms of Service" and accept it on Facebook platform.
- Fill the App id in Facebook App Id.
- Set the Install click-through lookback window to 28 Days.
- Turn ON "Install view-through attribution" if you want to pass the view-through install signal to Facebook.

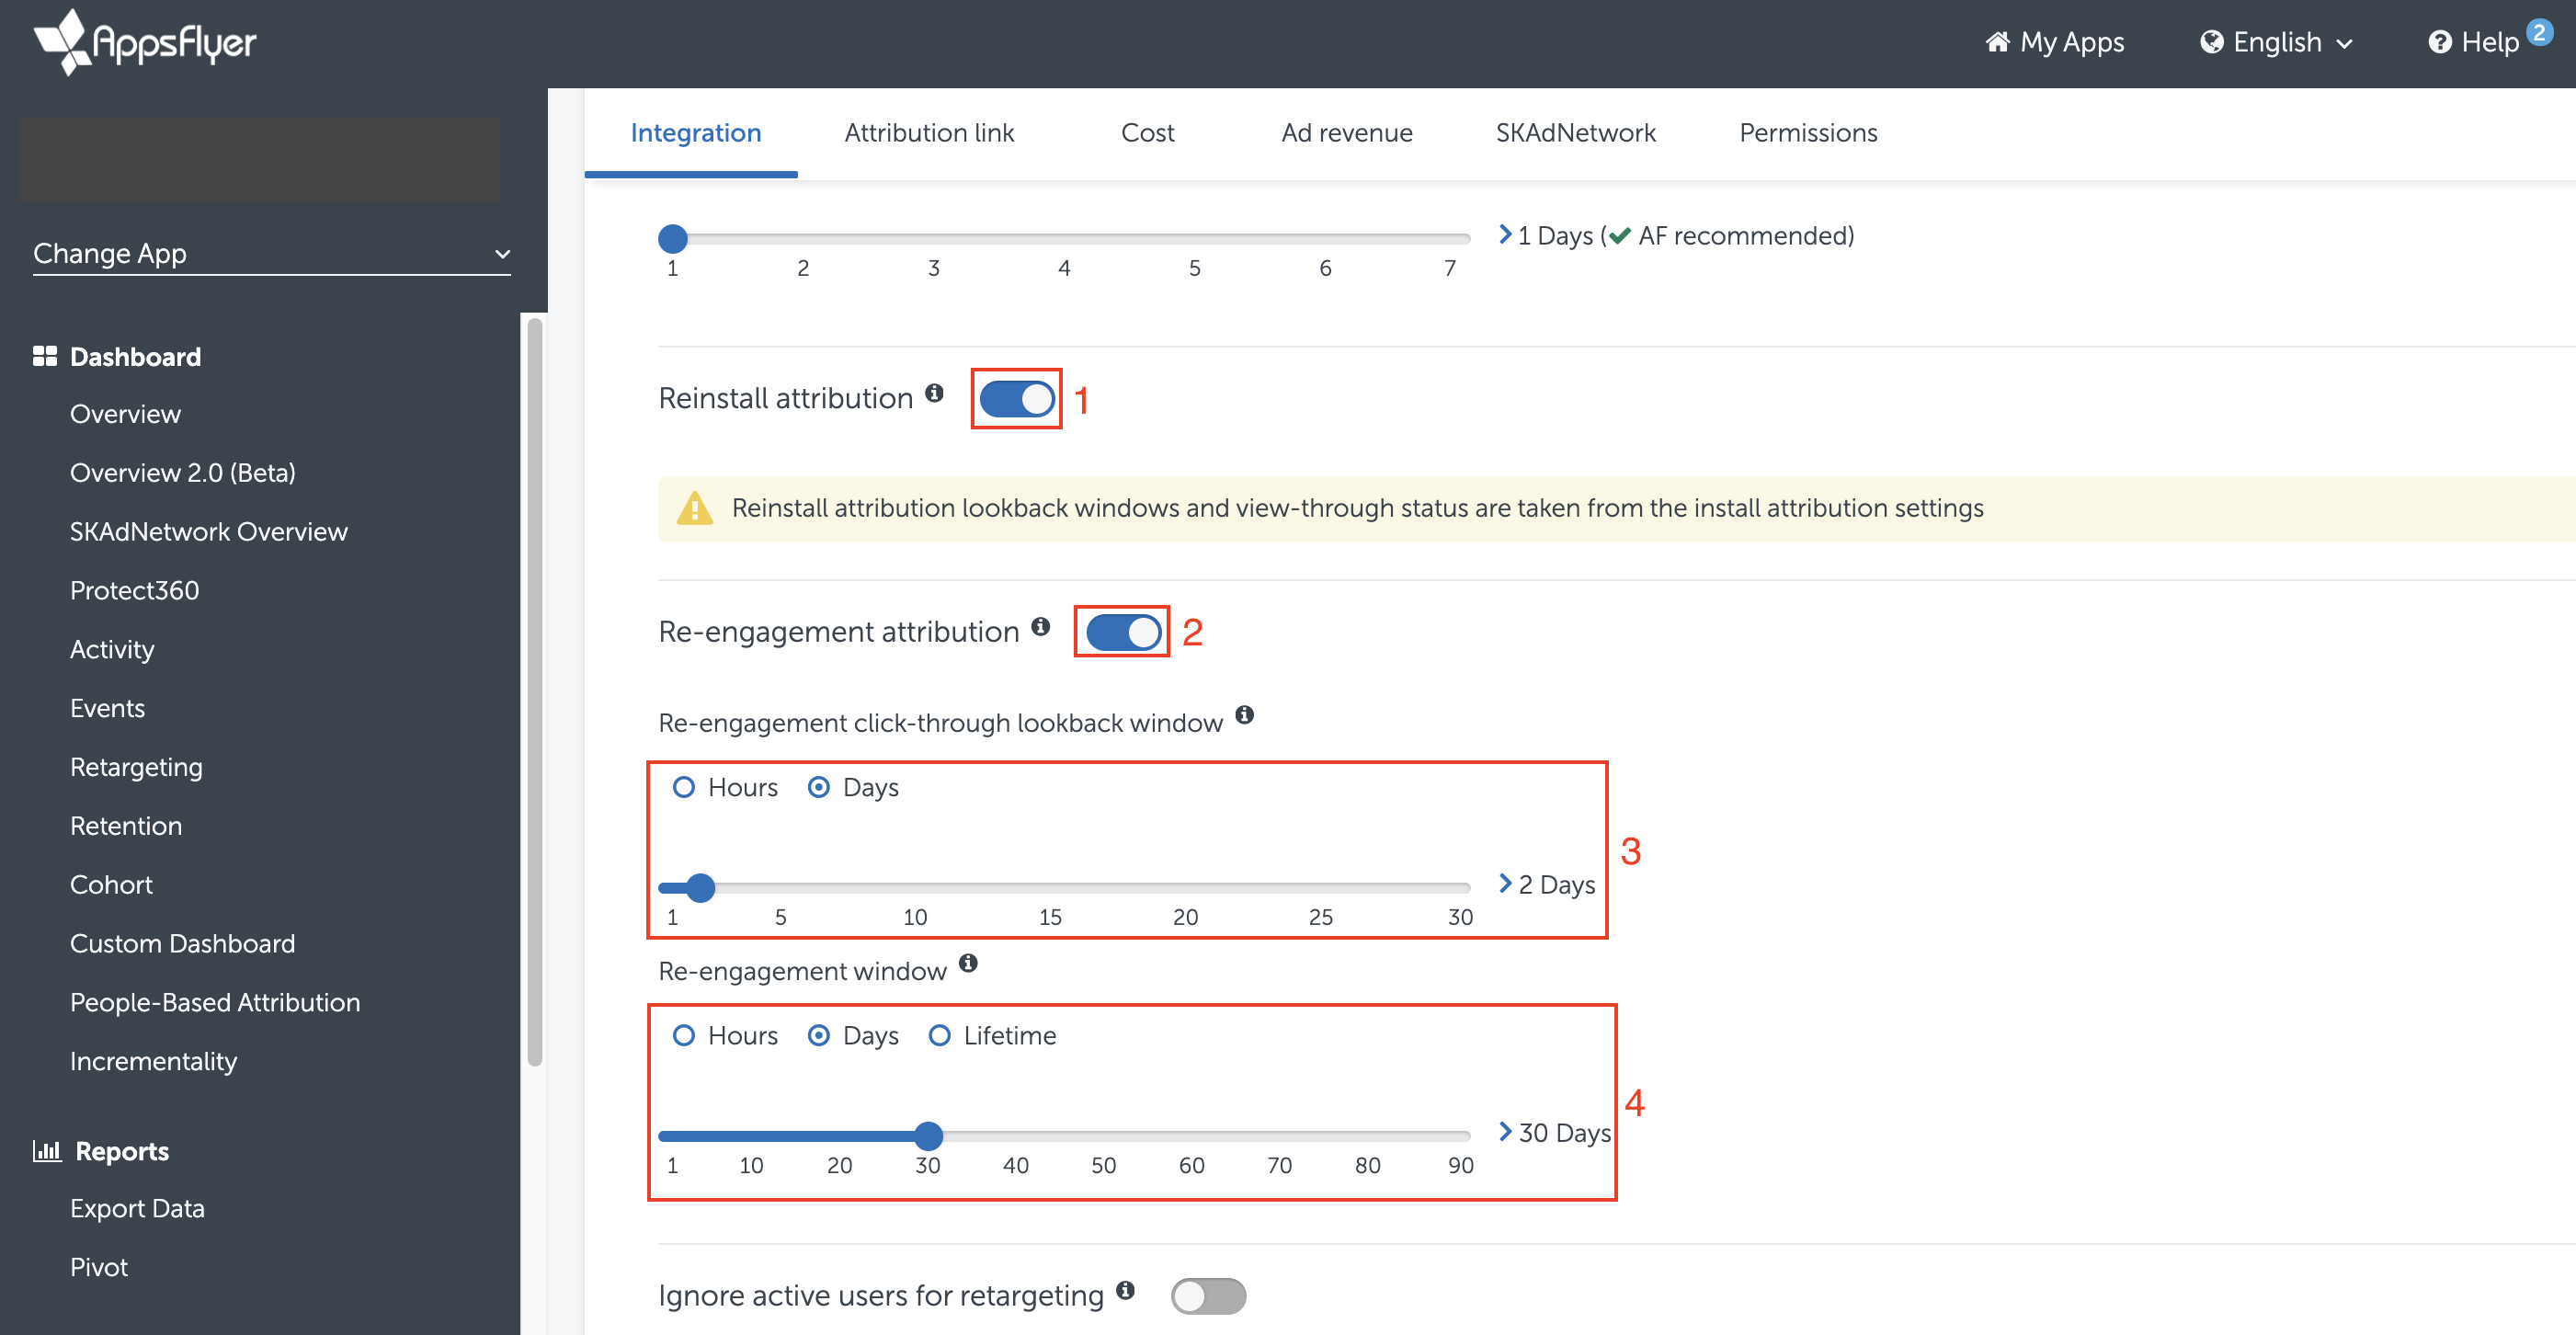
- Turn ON "Reinstall attribution".
- Turn ON "Re-engagement attribution".
- Choose the Re-engagement click-through lookback window.
- Choose the Re-engagement window.
Event setting
Only set the following step below if you don't implement Facebook SDK in your app.
- Turn ON "In-app event postbacks".
- Click "Add Event".
- Select the events you want to send to Facebook.
- Map the events with Facebook events one by one. (e.g. af_purchase mapping to fb_mobile_purchase)
- Select "All media sources, including organic".
- Select "Values & revenue" if the KPI relates to ROAS.
- Save Integration.
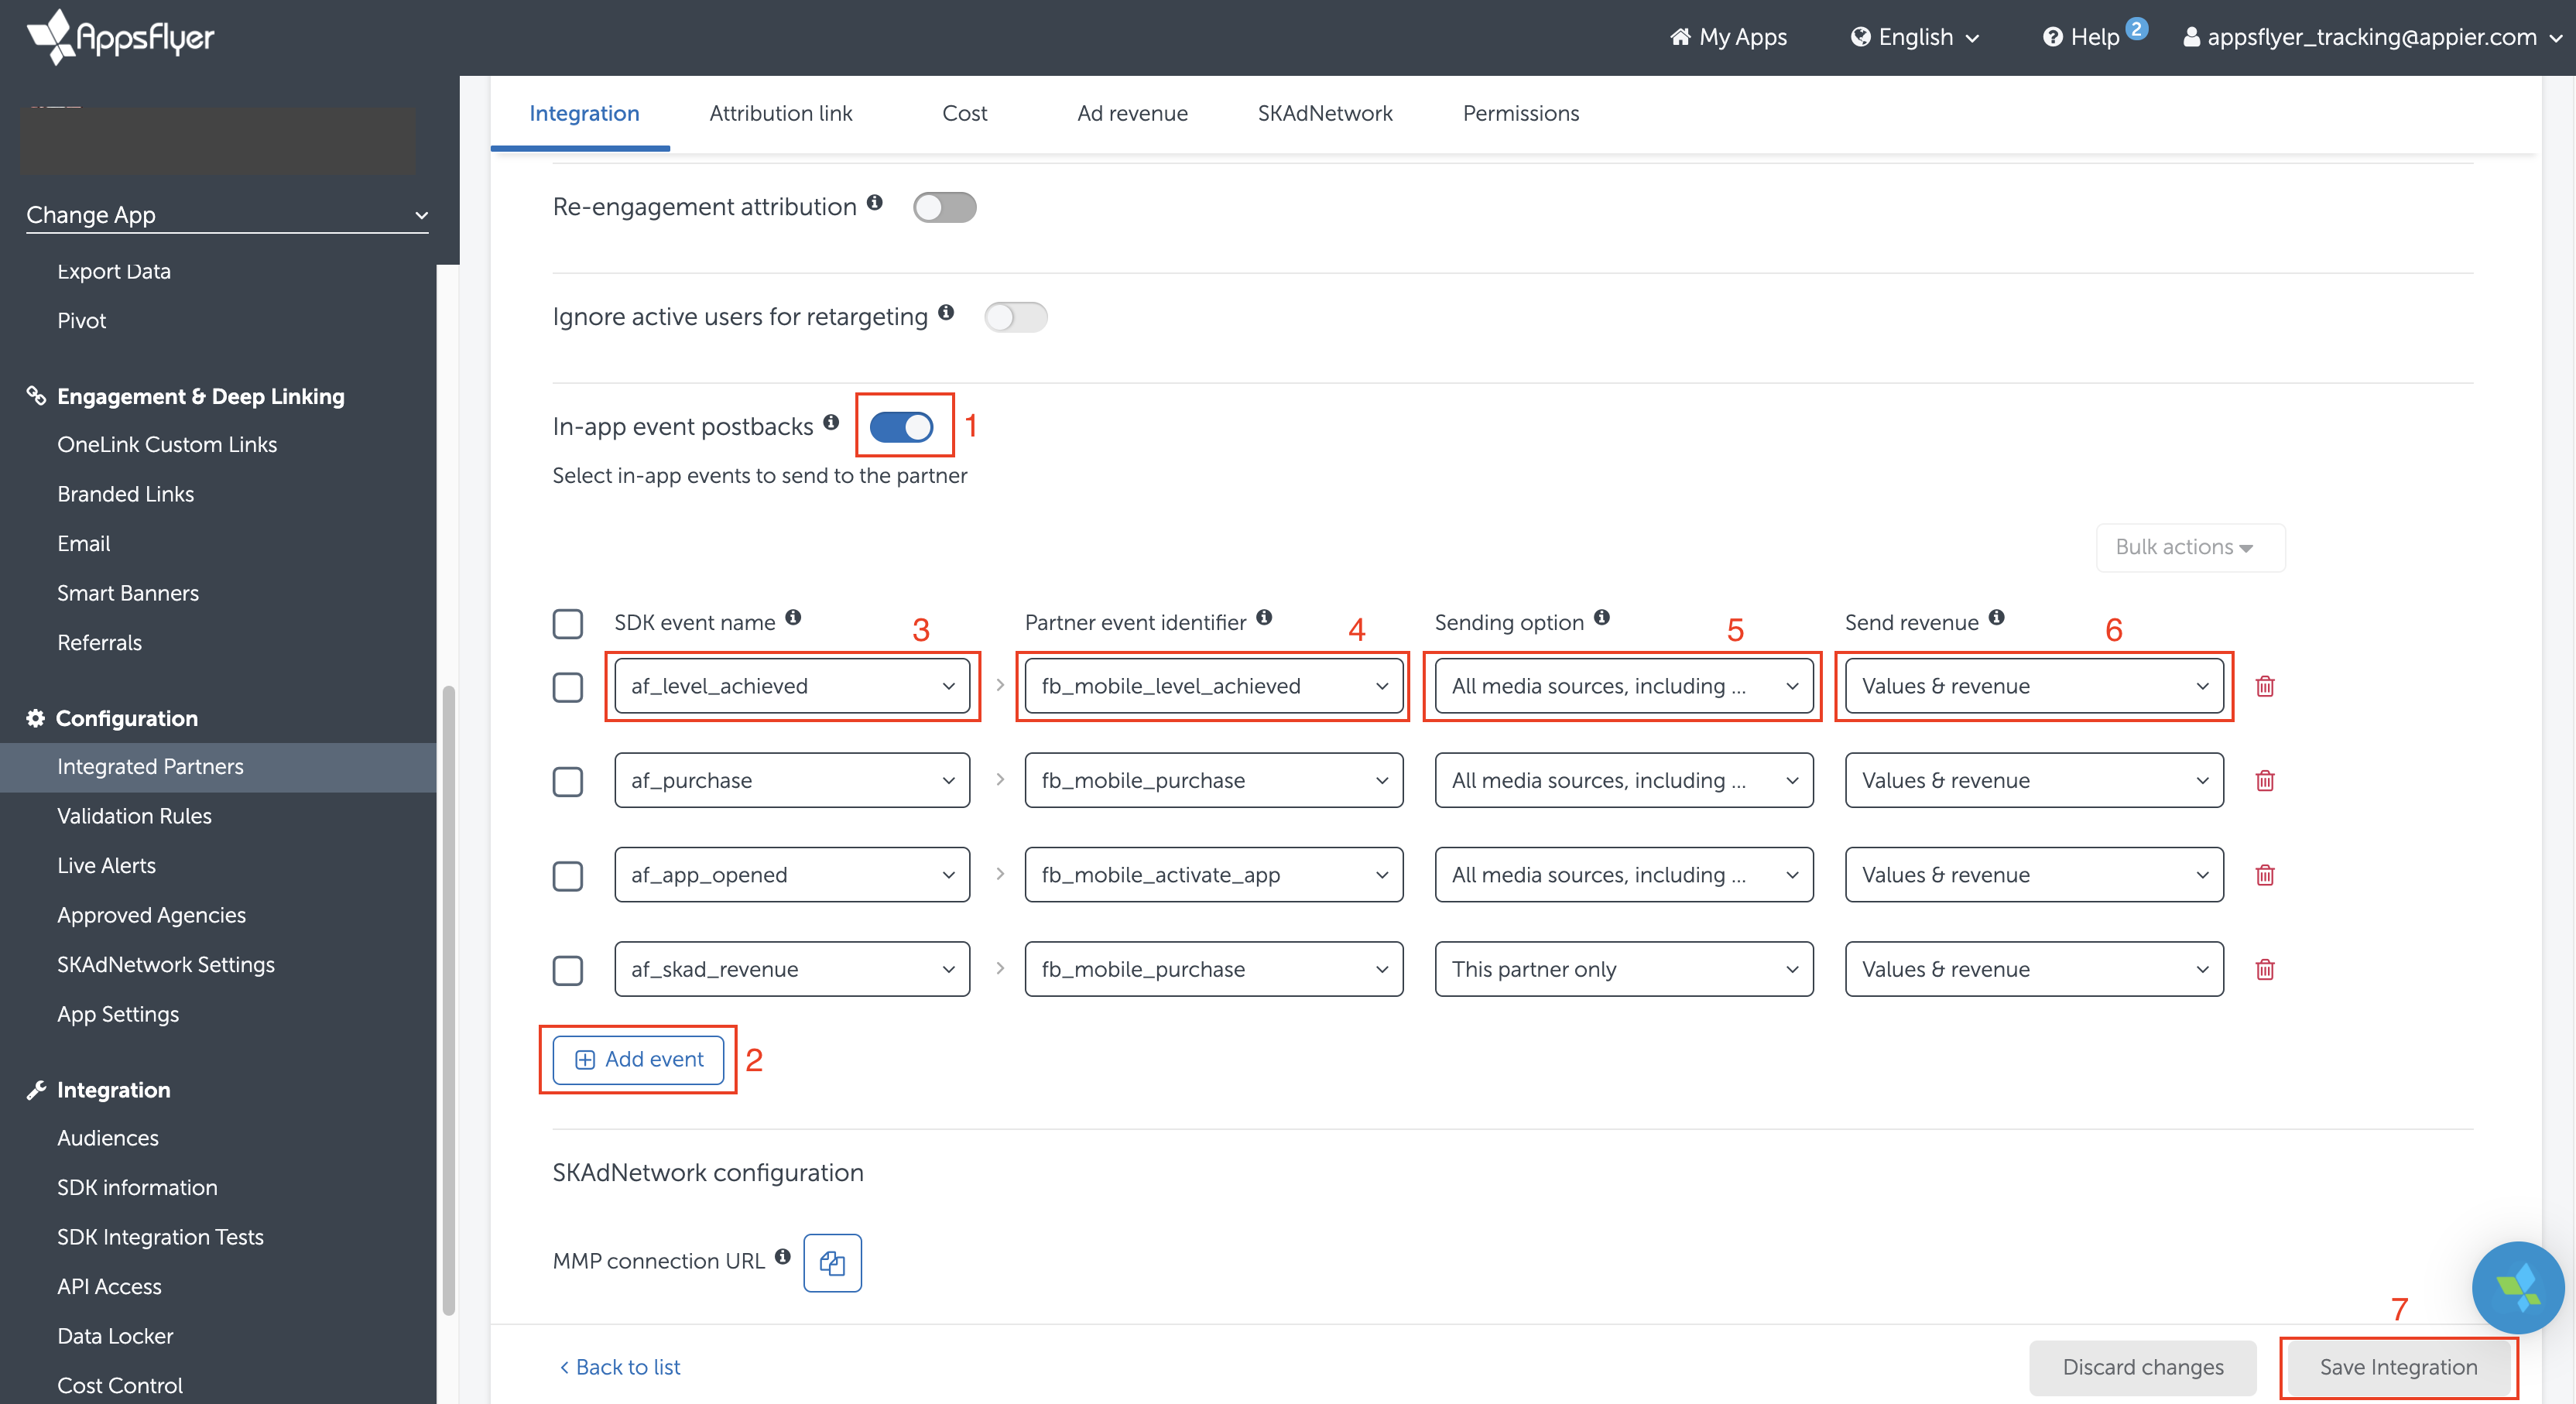
Screenshot 2 of 3
Please make a screenshot of this Facebook module integration page, as shown above.
FMP integration
Find Appier FMP module
- Click Integrated Partners on the app's dashboard menu.
- Search for "Appier" in the search bar.
- Select "Appier - Facebook Marketing Partner (Facebook marketing partner)".
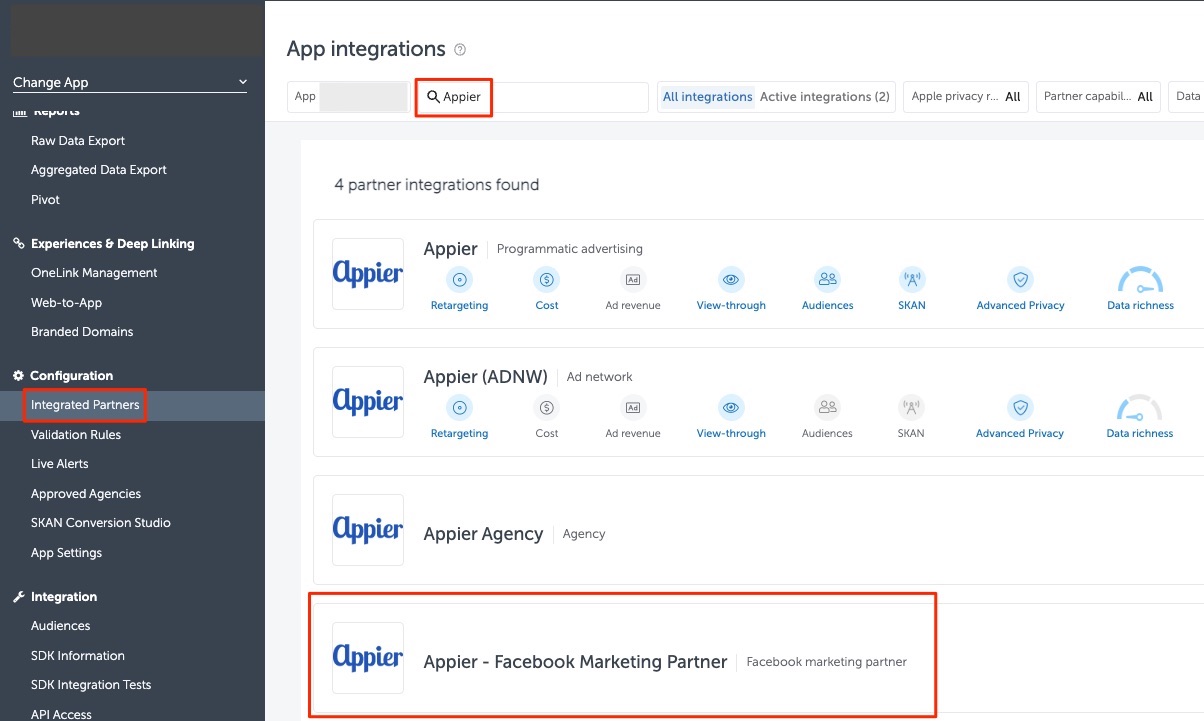
Appier FMP setting
- Select Integration.
30. Turn ON "Activate partner".
31. Turn ON "In-app event postbacks".
32. Choose "Add event".
33. Select the same events that you passed to Facebook in step 21.
34. For each event, select "This partner only".
35. For the KPI event, if the KPI is optimizing for ROAS, select "Values & revenue".
36. Save Integration.
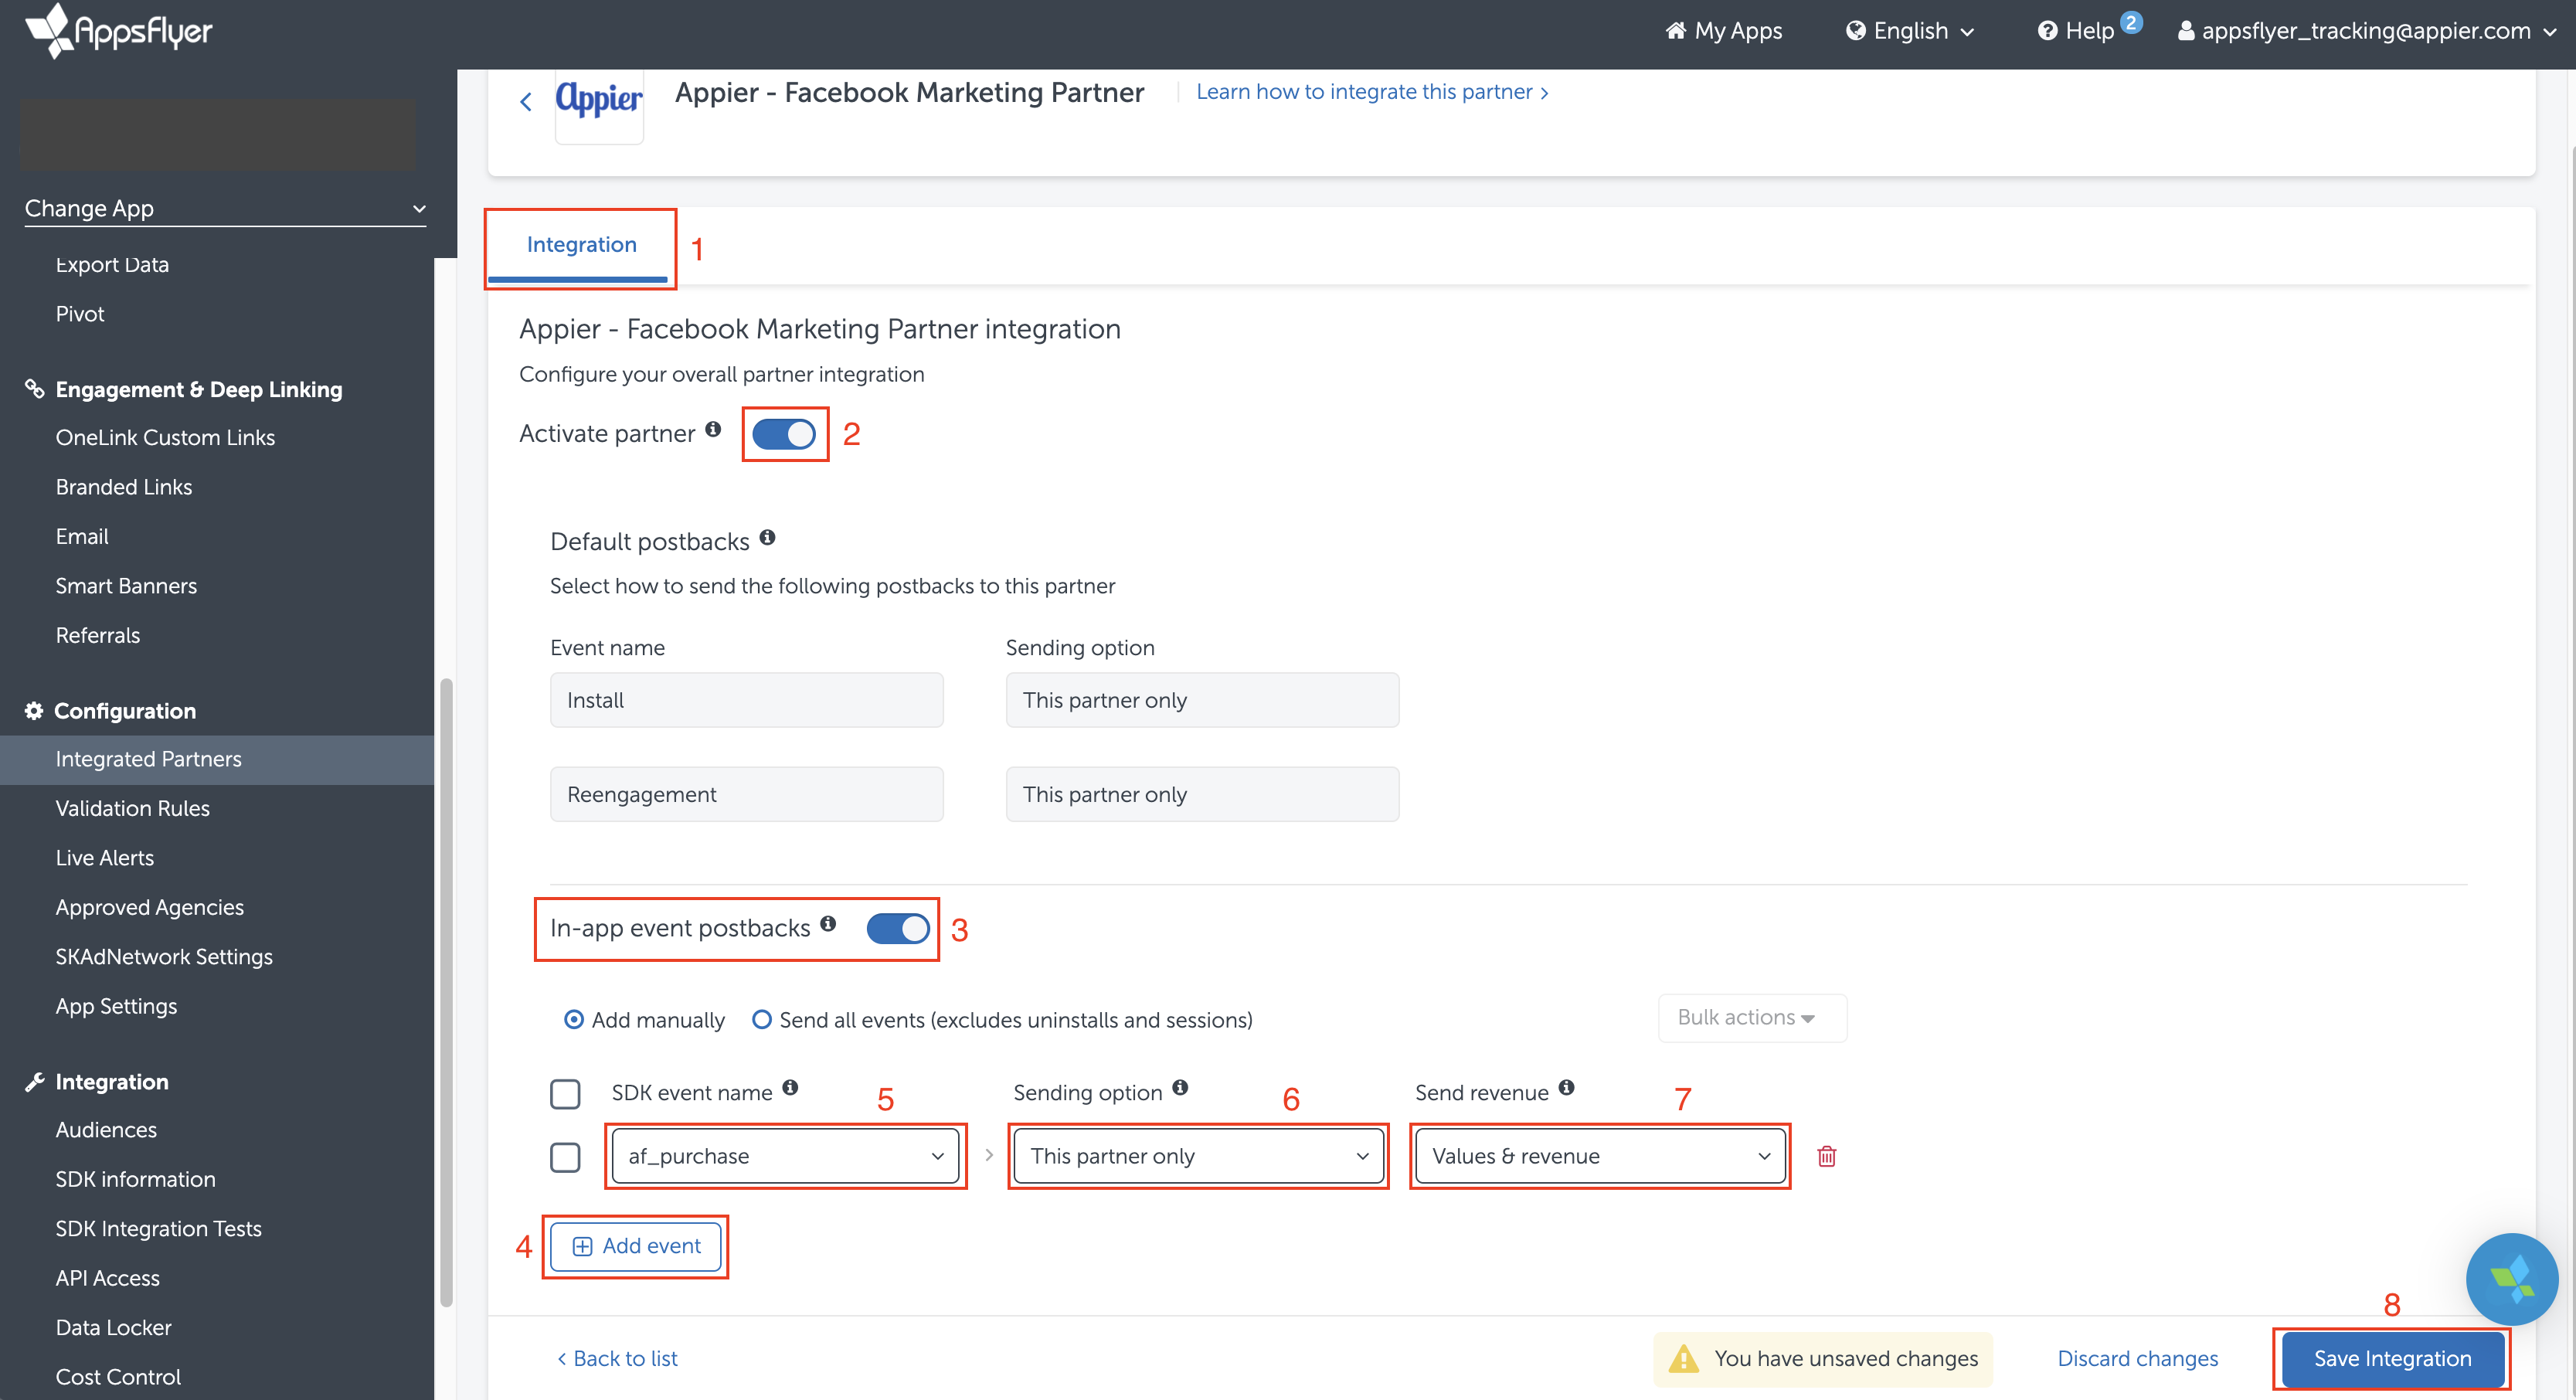
Screenshot 3 of 3
Please make a screenshot of the Appier module integration page, as shown above.
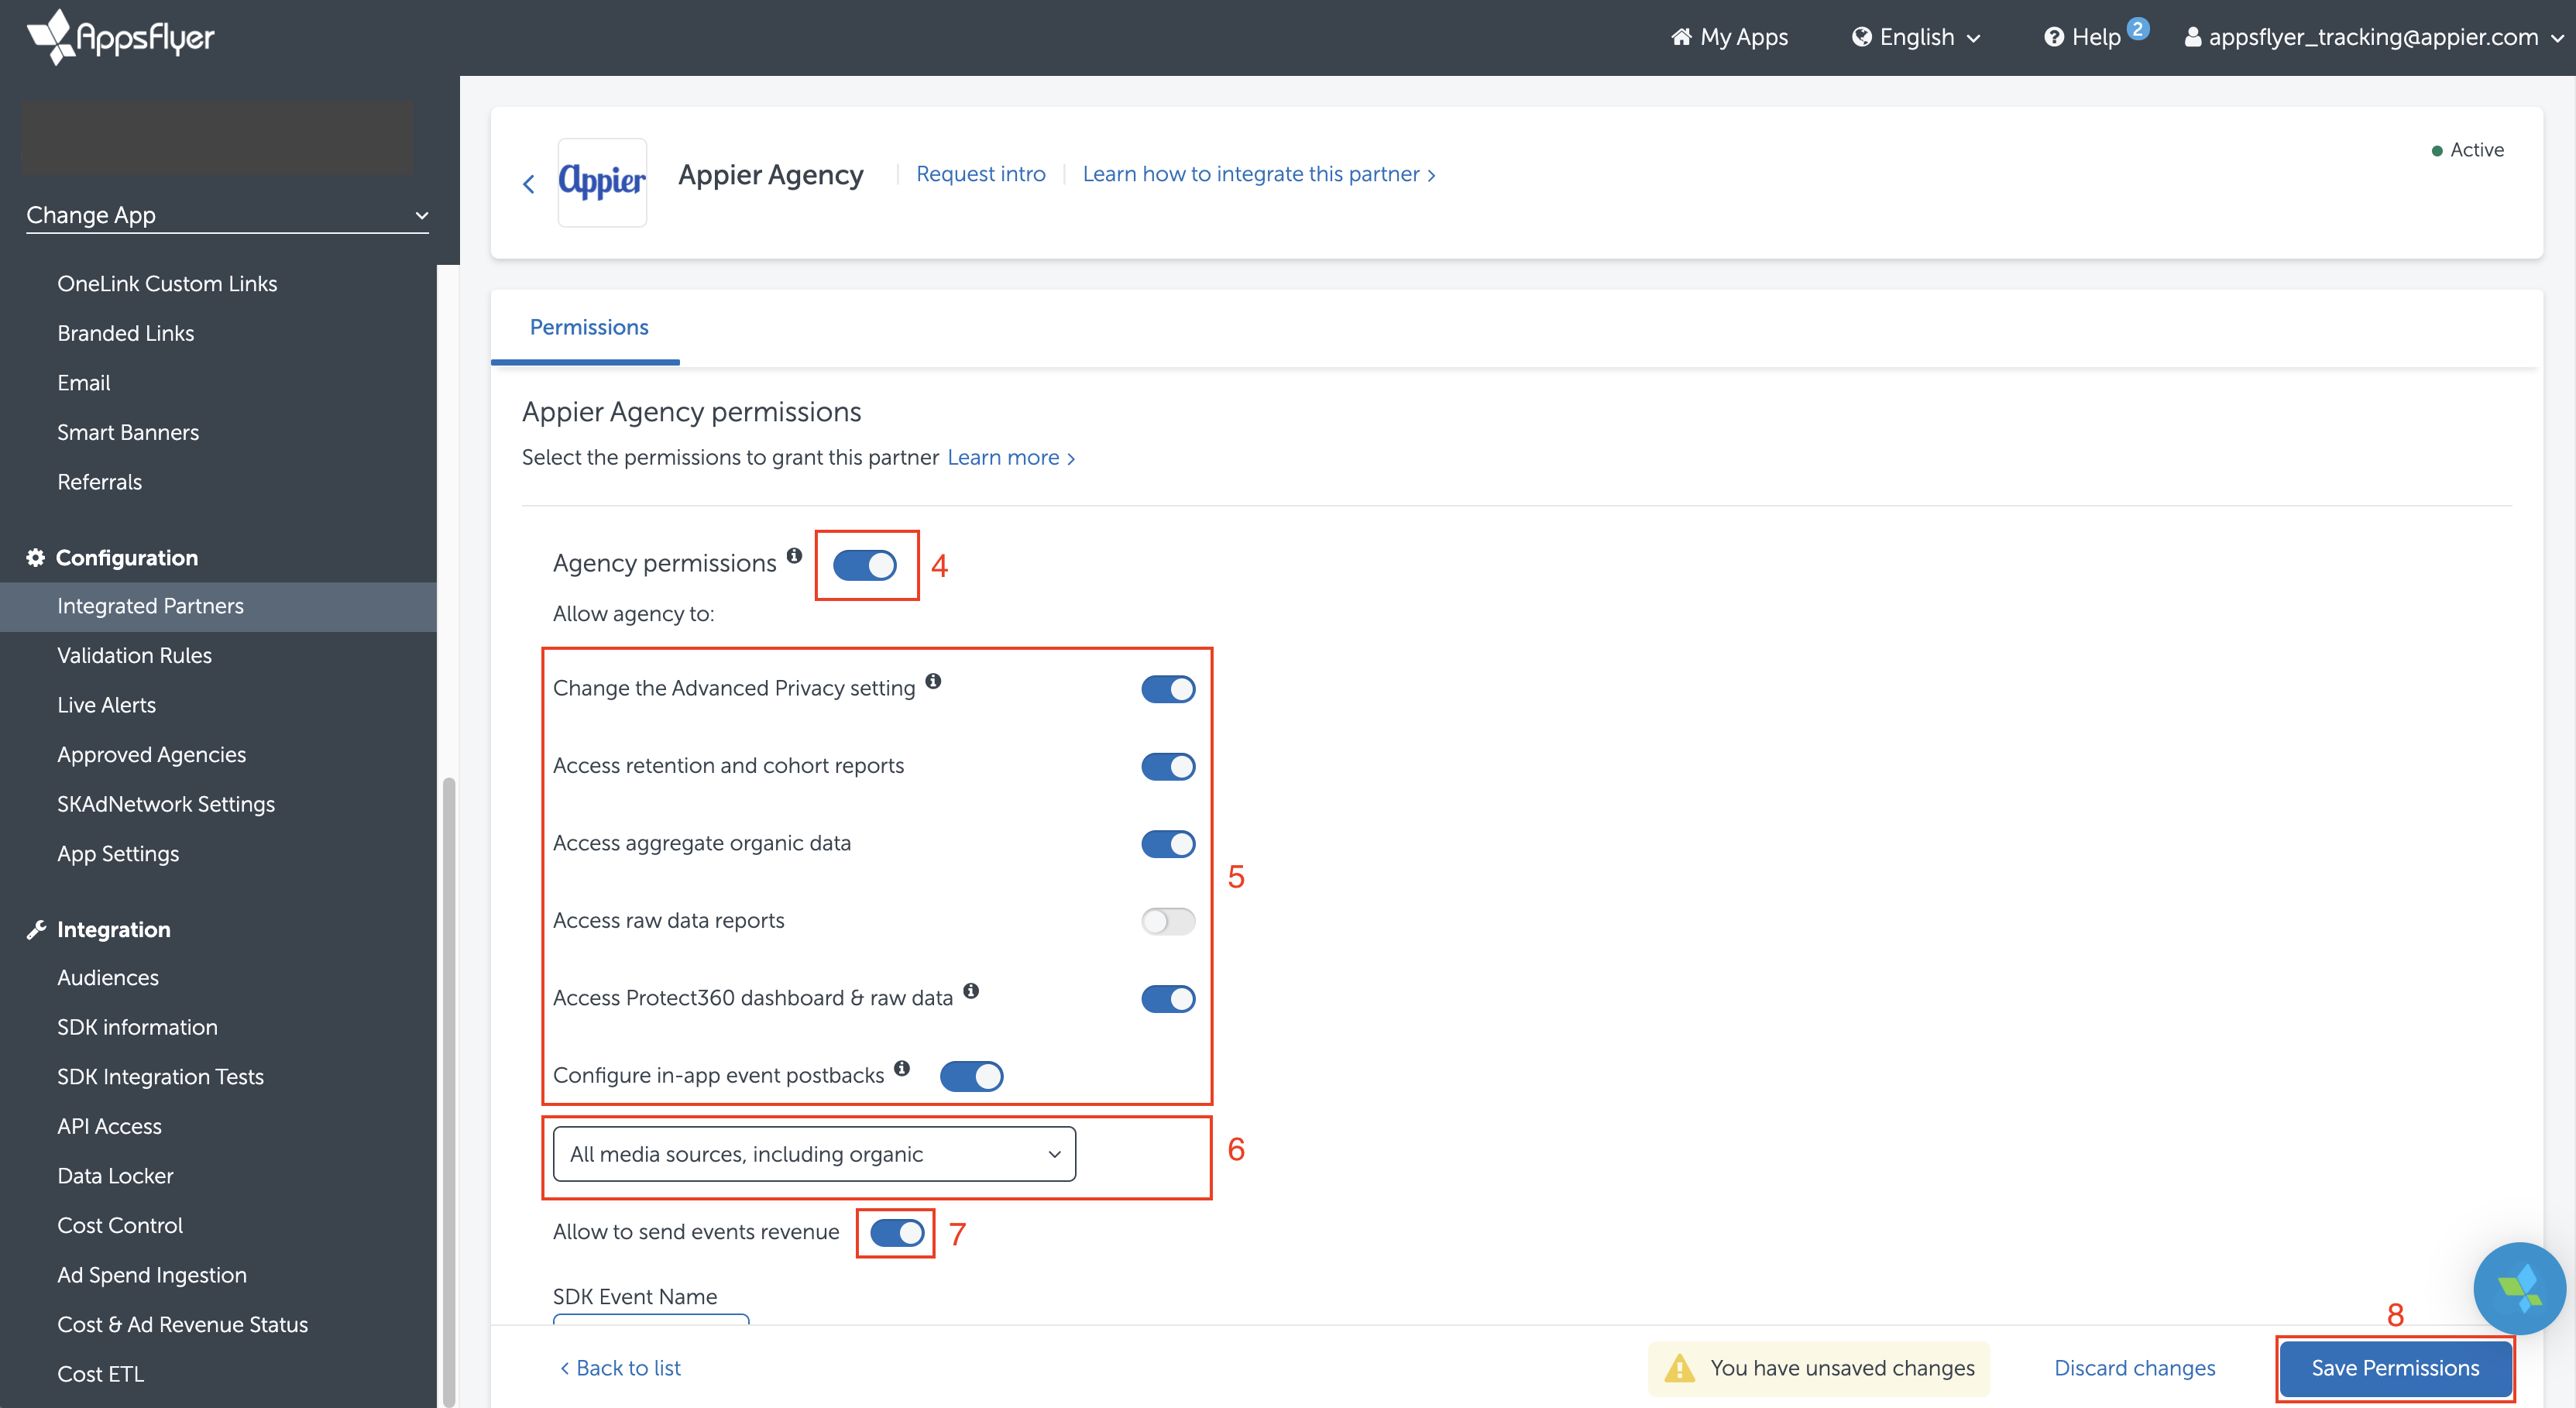
Grant Appier report permissions
- Click "Integrated Partners" on the app dashboard menu.
- Search for "Appier" in the search bar.
- Select "Appier Agency (Agency)".
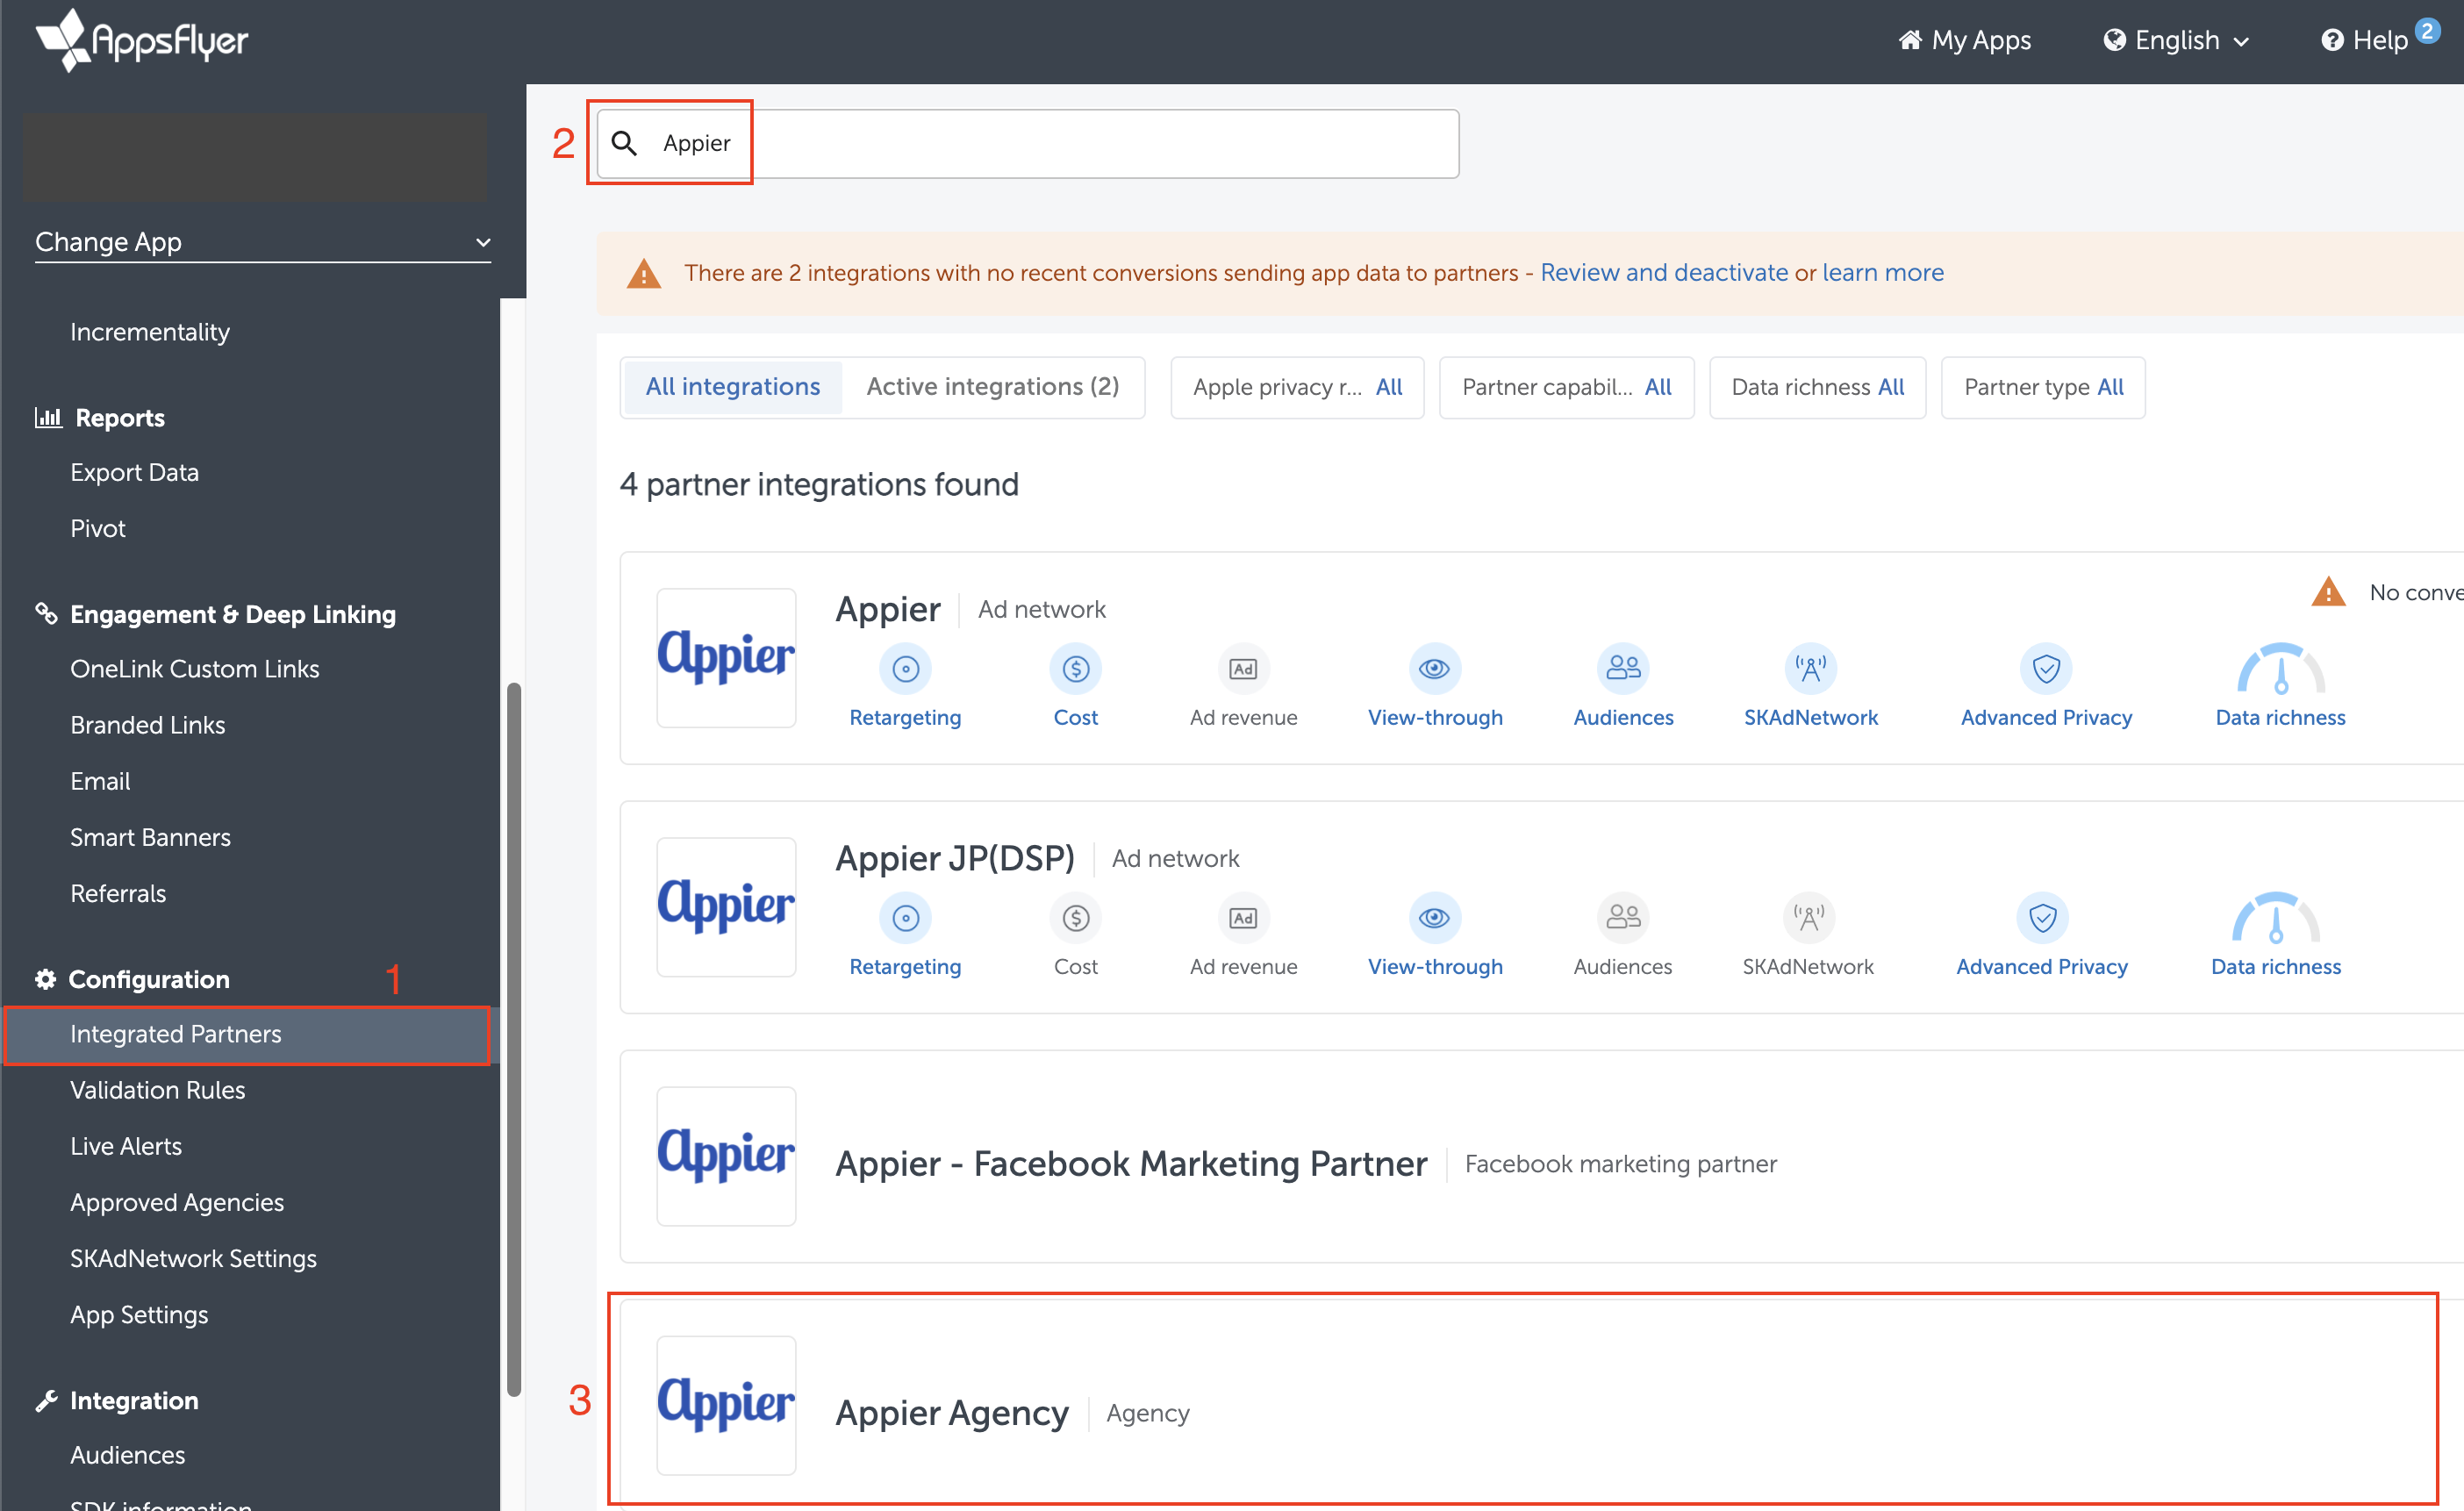
- Turn ON "Agency permissions".
- Turn ON the following permissions
- Change the Advanced Privacy setting
- Access retention and cohort reports
- Access aggregate organic data
- Access Protect360 dashboard & raw data
- Select "All media sources, including organic".
- Turn ON "Allow to send events revenue".
- Save Permissions.
Updated 10 months ago
